Cannoli bites with mascarpone and pistachio filling are a practical no-cook dessert built around the best parts of Italian pastry: crisp shells, cold cream, roasted nuts and dark chocolate.
Instead of making full-size cannoli, frying pastry tubes and filling them one by one, small shells or cups are filled with a rich mascarpone mixture and finished with pistachios.
The point is not to copy traditional Sicilian cannoli exactly. Proper Sicilian cannoli usually use ricotta and fried pastry shells.
Mascarpone gives a smoother, richer filling, while mini shells make the dessert easier to serve at parties, dinners and holidays. Chocolate adds depth, but it should support the pistachio and cream rather than dominate the whole bite.
Cannoli Bites with Mascarpone and Pistachio Filling
Cannoli bites with mascarpone and pistachio filling are an elegant no-bake dessert inspired by the flavors of traditional Sicilian cannoli.
Instead of making full-sized fried pastry tubes, crisp mini cannoli shells or pastry cups are filled with a rich mascarpone and pistachio cream, finished with roasted pistachios, and accented with dark chocolate.
Course
Dessert
Cuisine
Italian-Inspired
Keyword
Cannoli Bites, Italian Dessert, Mascarpone Recipe, Mini Cannoli, Pistachio Dessert
Prep Time30minutes
Cook Time5minutes
Chilling Time30minutes
Servings24cannoli bites
Calories145kcal
Ingredients
18-24mini cannoli shells or crisp pastry cups
250gmascarpone, cold
50gpistachio pastepreferably unsweetened
60–80gicing (powdered) sugar
100gdark chocolate, finely chopped
50gfinely chopped roasted pistachios
½tspvanilla extract
Small pinch fine sea salt
½tspfinely grated orange zestoptional
30gmini chocolate chips optional
Instructions
Prepare the Chocolate Shells
Melt the dark chocolate gently using a microwave in 20-second intervals or over a bowl of barely simmering water.
Brush a very thin coating of chocolate inside each mini shell or pastry cup.
Place them onto a tray and refrigerate for about 10 minutes until the chocolate hardens.
The chocolate barrier helps prevent the shells from softening after filling.
Prepare the Filling
Place the cold mascarpone into a mixing bowl.
Using a spatula or a mixer on its lowest speed, stir just until smooth.
Add:
Pistachio paste
Icing sugar
Vanilla extract
Pinch of salt
Mix only until fully combined.
If using mini chocolate chips or finely chopped chocolate, gently fold them into the filling.
Taste the mixture before adding extra sugar. The pistachio flavor should remain the star.
If desired, stir in the orange zest for extra freshness.
Chill the Filling
Cover the bowl and refrigerate the filling for 20–30 minutes.
This firms the mascarpone, making it easier to pipe neatly.
If the filling seems too soft after chilling, gently fold in 1–2 tablespoons of finely ground pistachios.
Fill the Cannoli Bites
Transfer the chilled filling into a piping bag fitted with a round or star tip.
Pipe the filling into each shell shortly before serving.
Dip the exposed ends into chopped pistachios.
Finish with one or more of the following:
Finely grated dark chocolate
Thin chocolate drizzle
Small piece of candied orange
Extra chopped pistachios
Serve immediately or refrigerate until serving.
Recipe Video
Recipe Notes
Always use cold mascarpone for the firmest filling.
Mix gently to prevent mascarpone from becoming loose.
Choose unsweetened pistachio paste whenever possible for the best nut flavor.
Keep the chocolate coating thin so the shells remain crisp without becoming difficult to bite.
Chill the filling before piping for cleaner presentation.
Fill the shells 30–60 minutes before serving for the ideal texture.
If the filling feels overly rich, add a little orange zest or fold in a spoonful of well-drained ricotta.
A tiny pinch of salt noticeably enhances the pistachio flavor.
Common Mistakes
Most cannoli bite problems come from warm filling, early assembly, or using overly sweet pistachio spread
The filling is too loose
Loose filling usually comes from warm mascarpone, overmixing or watery pistachio spread. Chill the mixture first. If needed, fold in finely ground pistachios.
The shells become soft
The shells were probably filled too early or not protected with chocolate. Use a thin chocolate lining and assemble closer to serving.
The dessert tastes too sweet
Reduce the icing sugar and use darker chocolate. Add salt carefully. Choose real pistachio paste rather than sweet pistachio cream.
The pistachio flavour is weak
Use more pistachio paste or add finely ground roasted pistachios. Artificial green colour is not a sign of better flavour.
The title mentions chocolate desserts, but the chocolate should not take over. Cannoli bites work best when chocolate appears in small, deliberate places.
Good chocolate choices:
dark chocolate brushed inside the shell
fine chocolate shavings on top
mini chocolate chips folded into the filling
thin drizzle across the finished bites
Milk chocolate can make the dessert too sweet. White chocolate can work with pistachio, but it moves the flavour away from classic cannoli and closer to candy. For this kind of chocolate dessert, dark chocolate gives the cleanest contrast.
Variations That Make Sense
Use only one variation at a time so the pistachio mascarpone filling stays balanced
Pistachio and mascarpone are flexible, but the dessert still needs restraint. Too many extras will make the filling taste confused.
For a different chocolate-and-fruit direction, a mango modak shows how cocoa, nuts and a soft fruit filling can work in a small, shaped dessert without needing a baked cake base.
Useful variations include:
orange zest for freshness
candied orange for a Sicilian-style note
a spoonful of drained ricotta for lighter texture
cocoa powder for a darker chocolate filling
crushed amaretti for almond flavour
espresso powder for a deeper adult version
Use one variation at a time. Pistachio, mascarpone and chocolate already provide plenty of flavour.
Serving Ideas
Cannoli bites suit situations where a full slice of cake feels too heavy. They work well after pasta, grilled meat, holiday meals or coffee.
Serve them on a chilled platter if the room is warm. Dusting the tray with extra chopped pistachios gives a clean pastry-shop look without making the dessert fussy.
@thesaltycooker Pistachio Cream filled cannolis are hands down my favorite dessert of all time. The first time I ever had a pistachio cream filled cannoli was in Florence Italy. The filling is creamy, sweet & a little salty from the pistachios and the crispy shell, ugh it’s utter perfection. I used organic no-shell pistachios from @nicholsfarms in both the shells and the filling. They’re grown in California by a fourth-generation family farm, and they add the best buttery pistachio flavor. If you’re looking for a Valentine’s Day dessert that feels special but still comforting, this is it ❤️ Comment PISTACHIO and I’ll DM you the full recipe plus the link to the pistachios I used. #nicholsfarms#pistachios#cannoli#homemadecannoli#italiandessert♬ original sound – Danielle Cochran
Cannoli bites with mascarpone and pistachio filling are a smart no-cook dessert because they respect the logic of cannoli without demanding the full traditional process.
The shell brings crunch, mascarpone gives body, pistachio adds character and dark chocolate keeps the sweetness under control.
The key is timing. Prepare the parts ahead, but fill the shells close to serving. Keep the chocolate layer thin, the mascarpone cold and the pistachio flavour honest. Done well, each bite tastes rich, crisp, nutty and polished without feeling heavy or overworked.
Panzerotti are traditionally served hot so the cheese remains soft and stretchy, and they're often paired with marinara sauce for dipping to complement the savory filling
Whip up a batch of irresistible ham-and-cheese panzerotti with this easy, foolproof recipe.
If you love crispy pastries with a rich filling and that unbeatable pull of melted cheese, panzerotti are exactly what you’re after.
This Italian classic is a little like a savory stuffed doughnut, and thanks to the soft, airy dough, it’s perfect for lunch, dinner, or sharing with friends. The prep is simple, and the payoff will win over anyone who loves homemade comfort food.
Golden, crispy on the outside and irresistibly cheesy on the inside, these homemade Ham-and-Cheese Panzerotti are the ultimate Italian comfort food.
Course
Appetizer, Main Course, Snack
Cuisine
Italian
Keyword
Homemade, Italian Recipe, Party Food
Prep Time1hour10minutes
Cook Time20minutes
Total Time1hour30minutes
Servings10panzerotti
Calories340kcal
Ingredients
For the dough
4cups all-purpose flour500 g
1cupwarm milk240 ml
2tbspoil30 ml
1tbspactive dry yeast10 g or half a cube of fresh yeast
1tspsugar
1tspsalt
For the filling
7ozham or smoked pork loin200 g finely chopped
7ozmozzarella or provoloneshredded (about 2 cups)
4-5tbspketchup
oreganoto taste
For frying
oil
Instructions
Make the dough:
Pour the warm milk into a large bowl, then stir in the yeast, sugar, and a spoonful of flour. Let it sit for about 10 minutes, until the yeast activates and turns foamy.
Add the oil and salt, then work in the rest of the flour a little at a time. Knead until you have a smooth, elastic dough.
Cover the bowl with a clean kitchen towel and set it in a warm spot for about 45 minutes, or until the dough has doubled in size.
Shape the panzerotti:
Punch down the risen dough and divide it into 10 to 12 equal balls.
Roll each ball out with a rolling pin into a circle about ¼ inch (5 mm) thick, roughly the size of a small plate.
Fill them:
Spread a little ketchup over one half of each circle. Add the ham (or pork loin), then the shredded cheese, and finish with a sprinkle of oregano.
Seal them:
Fold the empty half of the dough over the filling to form a half-moon.
Press the edges firmly with your fingers, then crimp them with a fork so the filling doesn't leak out while frying.
Fry them:
Heat a generous amount of oil in a deep skillet.
Fry the panzerotti over medium heat on both sides until they turn a beautiful golden color with a crisp crust.
Transfer them to a paper-towel-lined plate to drain any excess oil.
Serve:
Serve the panzerotti warm, while the cheese is still melted and creamy. They're delicious with plain yogurt, a cool dipping sauce, or whatever sauce you love best.
Recipe Video
Recipe Notes
Nutritional Information (Per Serving)
Serving Size
Approximately 165 g
Calories
340 kcal
Carbohydrates
33 g
Protein
15 g
Fat
17 g
Saturated Fat
5.5 g
Polyunsaturated Fat
3 g
Monounsaturated Fat
7 g
Trans Fat
0 g
Cholesterol
30 mg
Sodium
650 mg
Potassium
180 mg
Fiber
1.5 g
Sugar
3 g
Vitamin A
220 IU
Vitamin C
2 mg
Calcium
180 mg
Iron
2.2 mg
Pro Tips
For an even richer filling, toss in mushrooms, olives, spicy cured sausage (pepperoni works too), sweet corn, or fresh bell pepper.
Want a lighter version? Bake the panzerotti at 400°F (200°C) for about 20 minutes, until golden.
They taste best fresh, but a quick spin in the oven crisps them right back up.
If you’re thinking about something more meaty and faster to make, think about Italian beef sandwiches! Super easy to make and too tasty to miss out on! Be sure to check out this article on the best sides to serve them with, and by the way, these sides work perfectly with panzerotti as well!
Pastry flour and cake flour sit close together on the baking shelf, so the confusion is understandable. Both are softer than all-purpose flour. Both help reduce toughness. Both are used when tenderness is the goal.
The difference is in how much structure each flour gives. Cake flour is made for very soft, fine-crumb cakes. Pastry flour gives a little more strength, which makes it better for pie crusts, tarts, biscuits, scones and pastries that need tenderness without falling apart.
That small difference changes the result in the oven. A sponge cake made with pastry flour can feel a little sturdier than intended. A pie crust made with cake flour can become too delicate and harder to handle. Neither flour is bad. Each one has a job.
For Antonio Carluccio readers, flour choice usually brings pasta to mind first. In our guide to fresh egg pasta, flour decides how the dough rolls and how much bite it has. Baking works the same way: flour sets the texture before sugar, butter or eggs can do their part.
The Main Difference Is Protein
Protein content determines how much structure and tenderness a flour can create in the finished bake|Shutterstock
Protein is the first thing to understand. Flour protein affects how much gluten can form when flour meets liquid and mixing begins. More gluten gives more structure and chew. Less gluten gives tenderness and a softer crumb.
Pastry flour is low in protein, but it still gives more structure than many cake flours. Cake flour is usually the softer choice, made for cakes where the crumb should be fine, light and tender.
King Arthur Baking lists its pastry flour at 8% protein and describes it as useful for delicate pastries such as pie crusts and scones. Its cake flour guidance explains how cake flour substitutes use cornstarch to lower the overall protein content and create a more tender result.
The numbers vary by brand, country and milling style. That is why the bag matters. Two cake flours can behave differently, and two pastry flours can absorb liquid differently.
What Cake Flour Does Best
Cake flour is designed for tenderness. It is finely milled and lower in protein than all-purpose flour, so it forms less gluten during mixing. That helps cakes rise with a soft, fine crumb instead of becoming firm or chewy.
Use cake flour when the recipe depends on softness. A sponge, chiffon cake, angel food cake or very tender layer cake benefits from flour that stays out of the way. The cake should feel delicate, not bready.
When softness is the goal, cake flour is often the easiest way to achieve it|Shutterstock
Best Uses For Cake Flour
Angel food cake
Chiffon cake
Sponge cake
Soft vanilla or yellow layer cakes
Fine-crumb cupcakes
Delicate tea cakes
Some soft cookies where tenderness is the goal
Cake flour also helps when a batter contains plenty of sugar, fat and liquid. It supports a light cake without making the crumb tough. That is why it works so well in recipes where the texture should be airy and soft.
For a dessert example from this site, a light sponge such as Torta Paradiso con Mascarpone shows the kind of cake where flour choice has a direct effect on tenderness.
What Pastry Flour Does Best
Pastry flour is also low in protein, but it gives more strength than cake flour. That makes it useful when dough needs to stay tender but still hold shape.
A pie crust needs flakiness, but it also needs enough structure to lift, roll, crimp and hold filling. A scone should be tender, but it should not crumble into dust. A tart shell should bite cleanly without turning hard. That is where pastry flour earns its place.
Pastry flour balances tenderness and strength, making delicate doughs easier to handle|Shutterstock
Best Uses For Pastry Flour
Pie crust
Tart shells
Biscuits
Scones
Shortcrust pastry
Galettes
Some cookies
Quick breads with a tender crumb
Pastry flour gives a middle result between cake flour and all-purpose flour. It makes dough more tender than all-purpose flour, but less fragile than cake flour.
Side-By-Side Comparison
The best way to separate the two flours is to think about the final texture.
Question
Cake Flour
Pastry Flour
What is the main goal?
Softness and fine crumb
Tenderness with enough structure
Best for
Cakes and soft cupcakes
Pie crusts, scones, biscuits and tarts
How delicate is it?
Very delicate
More durable than cake flour
How does it handle rolling?
Not ideal for most rolled pastry doughs
Better for doughs that need rolling and shaping
How does it compare with all-purpose flour?
Much softer
Softer, but still practical for pastry work
Best mistake to avoid
Using it for dough that needs strength
Using it for very delicate cakes where cake flour is specified
If the recipe says cake flour, the writer likely wants a very soft crumb. If it says pastry flour, the writer likely wants tenderness plus structure. That difference is small on paper but noticeable in a finished bake.
Can You Substitute Pastry Flour And Cake Flour?
Substitutions can work, but the texture rarely stays exactly the same|Shutterstock
Sometimes, but the result changes. Cake flour and pastry flour are close enough for some home baking, but they are not identical.
If you use cake flour in place of pastry flour, the dough may become more delicate and harder to handle. That can be a problem for pie crust, tarts and galettes. If you use pastry flour in place of cake flour, the cake may be slightly firmer and less fine in crumb.
Better Substitution Rules
Recipe Calls For
Best Substitute
What To Expect
Cake flour
All-purpose flour mixed with cornstarch
Closer to cake flour tenderness than all-purpose alone
Pastry flour
Half all-purpose flour and half cake flour
A useful balance of tenderness and structure
Pastry flour
All-purpose flour alone
Works in many recipes, but texture may be firmer
Cake flour
Pastry flour
Acceptable for some cakes, but crumb may be less fine
Pastry flour
Cake flour
Can be too soft for rolled pastry and pie crust
King Arthur Baking gives a cake flour substitute using all-purpose flour and cornstarch: 3/4 cup plus 2 tablespoons all-purpose flour mixed with 2 tablespoons cornstarch. That works because the cornstarch lowers the overall protein effect and increases tenderness.
How To Make A Cake Flour Substitute
Use this when a recipe calls for cake flour and you only have all-purpose flour and cornstarch.
Ingredient
Amount
All-purpose flour
3/4 cup plus 2 tablespoons
Cornstarch
2 tablespoons
Whisk them together very well. For delicate cakes, sift the mixture once or twice so the cornstarch distributes evenly.
By weight, use 105g all-purpose flour and 14g cornstarch as a practical starting point for one cup of cake flour substitute. This is helpful for home bakers who measure more carefully.
How To Make A Pastry Flour Substitute
Pastry flour is harder to imitate perfectly, but a good home substitute is simple: mix equal parts all-purpose flour and cake flour.
Ingredient
Amount
All-purpose flour
1/2 cup
Cake flour
1/2 cup
This blend lands between the structure of all-purpose flour and the tenderness of cake flour. It works well for many scones, biscuits, galettes and tart shells.
If you do not have cake flour either, all-purpose flour can still work for many pastry recipes. The result will be a bit sturdier. For pie crust, handle the dough lightly and avoid overworking it.
Why Bleached And Unbleached Labels Can Change The Result
Cake flour is often bleached in the United States, although unbleached versions exist. Bleaching can affect how the flour handles sugar, fat and liquid. That is one reason cake flour can help produce fine, tender cakes.
Pastry flour is often unbleached. It is commonly used where the baker wants tenderness but still wants the dough to roll, shape and brown naturally.
The important point is practical: read the label and follow the recipe when texture is important. A chiffon cake, shortcrust tart and buttermilk biscuit all ask different things from flour.
When All-Purpose Flour Is Enough
All-purpose flour works for many home bakes. Cookies, muffins, quick breads and simple cakes are often forgiving. If a recipe does not specify cake flour or pastry flour, all-purpose flour is usually the expected choice.
Use cake flour or pastry flour when texture is the main point of the recipe. A very tender cake benefits from cake flour. A delicate pie crust or scone benefits from pastry flour. For everyday baking, all-purpose flour remains useful because it balances structure and softness.
What You Are Making
Best Flour Choice
Why
Angel food cake
Cake flour
Needs a very soft, fine crumb
Layer cake
Cake flour or all-purpose, depending on recipe
Cake flour gives more tenderness
Pie crust
Pastry flour or all-purpose
Pastry flour gives tenderness without too much fragility
Scones
Pastry flour
Helps keep texture tender but structured
Biscuits
Pastry flour or low-protein all-purpose flour
Reduces toughness when handled lightly
Cookies
All-purpose or pastry flour
Depends on whether you want chew or tenderness
Pasta
Tipo 00, semolina or pasta flour
Pastry and cake flour are not the best choices for pasta dough
For Italian cooking, this distinction also helps with pasta. Flour for cakes and pastries is not the same as flour for pasta. Our guide to semolina flour versus all-purpose flour for pasta explains why firm pasta usually needs flour with a different structure than delicate cake flour.
Common Mistakes With Pastry Flour And Cake Flour
Most mistakes come from treating soft flours as interchangeable. They are similar, but the recipe decides how much structure is needed.
Using cake flour for pie crust and wondering why the dough feels too fragile.
Using pastry flour for angel food cake and losing some of the fine, airy texture.
Using all-purpose flour in a very delicate cake without adjusting expectations.
Overmixing low-protein flour and still creating a tougher texture than intended.
Measuring by packed cups instead of lightly spooned cups or weight.
Using pastry flour for bread dough, then getting weak structure.
Using cake flour for pasta dough, which lacks the bite and structure pasta needs.
Low-protein flour helps with tenderness, but technique still matters. Overmixing, too much flour on the board, warm butter in pastry dough or poor measuring can ruin the texture even when the flour choice is right.
How To Store Pastry Flour And Cake Flour
Proper storage helps preserve freshness, performance, and flavor over time|Shutterstock
Both flours should be kept dry, sealed and away from heat. A cool pantry is usually fine for short-term storage. If you bake slowly and keep flour for months, use an airtight container.
Whole wheat pastry flour needs more care than white pastry flour because it includes the germ, which contains natural oils. Store whole wheat pastry flour in the refrigerator or freezer if you will not use it quickly.
Flour
Best Storage
Warning Signs
Cake flour
Airtight container in a cool pantry
Musty smell, clumps, insects
White pastry flour
Airtight container in a cool pantry
Stale smell, moisture, insects
Whole wheat pastry flour
Fridge or freezer for longer storage
Bitter, oily or rancid smell
FAQs
Are Pastry Flour And Cake Flour The Same?
No. They are both soft, low-protein flours, but cake flour is usually used for very tender cakes, while pastry flour gives more structure for pie crusts, tarts, biscuits and scones.
Can I Use Cake Flour Instead Of Pastry Flour?
Sometimes. It can work in soft cookies and some tender bakes, but it may be too delicate for rolled pie crust, tart shells and galettes.
Can I Use Pastry Flour Instead Of Cake Flour?
Sometimes. It can work in many cakes, but the crumb may be a little firmer and less fine than it would be with cake flour.
Which Flour Is Better For Pie Crust?
Pastry flour is usually better for pie crust because it gives tenderness while keeping enough structure for rolling, lifting and crimping.
Which Flour Is Better For Sponge Cake?
Cake flour is usually better for sponge cake because it helps create a finer, softer crumb.
Can I Use Pastry Flour Or Cake Flour For Pasta?
They are not the best choice. Pasta needs a different kind of structure. Tipo 00, semolina or semola rimacinata are better choices for most
pasta doughs.
Does Low Protein Always Mean A Better Bake?
No. Low protein helps with tenderness, but bread, pizza and pasta need more structure. The best flour depends on what you are making.
Bottom Line
Pastry flour and cake flour are close, but they do not do the same job. Cake flour is best when the goal is a very soft, fine cake crumb. Pastry flour is better when dough needs tenderness plus enough structure to roll, shape or hold filling.
Use cake flour for sponge cakes, angel food cakes, chiffon cakes and soft layer cakes. Use pastry flour for pie crusts, tarts, biscuits, scones and delicate pastry doughs. Keep all-purpose flour for flexible everyday baking.
Once you match the flour to the texture you want, baking becomes easier to control. The bag of flour is not just a dry ingredient. It is the first decision about whether the final bake will be airy, flaky, tender, sturdy or somewhere in between.
Wheat flour and whole wheat flour may sound almost the same, but they behave very differently in dough. One gives a lighter texture, a milder taste and a softer crumb. The other brings more flavor, more fiber and a denser structure.
The difference starts inside the wheat kernel. A whole grain has three edible parts: bran, germ and endosperm. Whole wheat flour uses all three. Regular wheat flour, often sold as refined white flour or all-purpose flour, is mostly made from the endosperm after the bran and germ have been removed.
That small milling difference changes almost everything: color, flavor, nutrition, shelf life, dough strength, water absorption and baking results. It also matters for pasta, bread, pizza, cakes and homemade doughs.
As we shared in our guide to fresh egg pasta, the dough depends on flour that can roll thinly and stay flexible. Whole wheat flour can be used there too, but it needs a different approach.
The Basic Difference Comes From The Wheat Kernel
The biggest difference between the two flours is simple: one keeps the entire grain, while the other uses mostly the starchy center|Credits: Shutterstock
A wheat kernel has three main edible parts. The endosperm is the starchy center. The bran is the outer layer. The germ is the small inner part that can sprout into a new plant.
Whole wheat flour keeps the full kernel. Refined wheat flour removes the bran and germ during milling, leaving mainly the endosperm. That gives refined flour a paler color and finer texture, but it also removes much of the natural fiber and some nutrients. The USDA MyPlate grain guidance explains this split between whole grains and refined grains, while the Whole Grains Council describes whole grains as grains that keep the bran, germ and endosperm.
Part Of The Wheat Kernel
What It Adds
Present In Whole Wheat Flour
Present In Refined Wheat Flour
Bran
Fiber, color, texture and a slightly earthy taste
Yes
Usually removed
Germ
Natural oils, vitamins, minerals and fuller flavor
Yes
Usually removed
Endosperm
Starch and protein for dough structure
Yes
Yes
That is the cleanest way to understand the difference. Whole wheat flour uses the full grain. Refined wheat flour keeps the lighter, starchier center.
Why Refined Wheat Flour Feels Lighter
Refined wheat flour is lighter because the bran and germ are removed. Without those rougher grain parts, the flour feels finer, blends more smoothly with liquid and makes softer doughs.
That is why refined flour is used for many cakes, fresh pasta sheets, delicate pastries, white sandwich bread, pizza dough and sauces. It gives a clean texture and a neutral taste. It also stores longer because the germ, which contains natural oils, has been removed.
Many refined flours in the United States are enriched. Enrichment adds back certain nutrients, such as thiamin, riboflavin, niacin, folic acid and iron, under U.S. enriched flour rules. The federal regulation for enriched flour lists the required added nutrients.
Enrichment is useful, but it does not fully recreate whole wheat flour. Fiber and the original structure of the grain do not come back in the same way.
Why Whole Wheat Flour Feels Heavier
Whole wheat flour has more texture because it includes bran and germ. That gives it a deeper flavor and a slightly darker color. It also makes dough absorb more water.
In bread, whole wheat flour can make the crumb denser. In pasta, it can make dough more rustic and less silky. In cakes, it can make the texture heavier. That does not make it worse. It simply means it needs a different formula.
The bran in whole wheat flour can interrupt gluten development. Gluten gives dough stretch and structure. When bran is present, dough may tear more easily or feel less elastic. That is why many bakers and pasta makers use whole wheat flour in blends rather than using it alone.
Flour
Texture
Flavor
Dough Behavior
Best Uses
Refined wheat flour
Fine and soft
Mild
Rolls and stretches easily
Cakes, pastry, white bread, pizza, fresh pasta
Whole wheat flour
Coarser and denser
Nutty and fuller
Absorbs more water and can feel firmer
Whole wheat bread, rustic doughs, biscuits, pancakes, hearty pasta blends
Nutrition Difference: Fiber Is The Big Change
Most of the nutritional gap between these flours comes from the fiber-rich bran retained in whole wheat flour|Credits: Shutterstock
The biggest nutrition difference is fiber. Whole wheat flour keeps the bran, so it naturally has more fiber than refined wheat flour. It also keeps more naturally occurring minerals and plant compounds from the full grain.
The Harvard Nutrition Source describes whole grains as a full package that includes bran, germ and endosperm, with nutrients spread across those parts of the grain.
Refined wheat flour can still be part of normal cooking. The point is not that one flour is bad and the other is perfect. The better choice depends on the recipe, the texture you want and how the flour fits into the meal.
Nutrition Point
Refined Wheat Flour
Whole Wheat Flour
Fiber
Lower
Higher
Texture
Lighter
Heavier
Flavor
Mild and neutral
Nutty, earthy and stronger
Shelf life
Longer
Shorter because the germ contains natural oils
Best everyday use
Soft doughs and delicate textures
Hearty breads, rustic baking and blended doughs
Wheat Flour On A Label Does Not Always Mean Whole Wheat
This is where many shoppers get confused. On many ingredient labels, “wheat flour” usually means refined wheat flour unless the label says “whole wheat flour.”
Words such as wheat, multigrain, stone-ground, rustic or brown do not automatically mean the product is made from whole wheat flour. The ingredient list gives the clearer answer. Look for “whole wheat flour” or “100% whole wheat flour” near the beginning of the list.
The Whole Grains Council guidance page summarizes government label discussions around whole grain statements, and the practical lesson is simple: front labels can be vague, but ingredients are harder to hide.
Label Terms To Read Carefully
Label Term
What It May Mean
What To Check
Wheat flour
Usually refined wheat flour
Look for the word “whole”
Whole wheat flour
Flour made from the full wheat kernel
Check if it is the first ingredient
100% whole wheat
All wheat flour should be whole wheat
Still check sugar, salt and additives
Multigrain
Contains more than one grain
Those grains may still be refined
Made with whole grains
Contains some whole grain
May still contain mostly refined flour
How They Behave In Bread
Refined wheat flour makes bread lighter and softer. Whole wheat flour gives bread more flavor, but it also makes dough denser and thirstier.
If you replace white flour with whole wheat flour cup for cup, the dough may feel dry. That happens because bran and germ absorb liquid. The loaf may also rise less because whole wheat dough does not stretch as easily.
Better Whole Wheat Bread Results
Small adjustments in hydration and fermentation can noticeably improve whole wheat bread texture|Credits: Shutterstock
Start by replacing 25% to 50% of refined flour with whole wheat flour.
Add a little more water or milk to the dough.
Rest the dough before kneading so the flour can hydrate.
Use longer fermentation for better flavor and softer texture.
Try white whole wheat flour for a milder taste.
For rustic breads, whole wheat flour works beautifully. For soft dinner rolls or very light sandwich bread, refined flour or a partial blend gives a gentler result.
How They Behave In Pasta
Even modest flour changes can alter how pasta rolls, cooks and holds sauce on the plate|Credist: Shutterstock
For pasta, refined wheat flour gives a smooth dough that rolls thinly. Whole wheat flour adds flavor, but it can make pasta rougher, firmer and more likely to tear if used alone.
That is why fresh pasta often uses soft refined flour, such as Italian tipo 00, especially for ravioli, tortellini and thin sheets. In our guide to semolina flour versus all-purpose flour for pasta, the same idea appears in another form: flour choice changes bite, texture and sauce grip.
Whole wheat flour can work very well in pasta when it is used with care. It is best in hearty ribbons, rustic sheets, soups and pasta served with strong sauces.
Pasta Type
Better Flour Choice
Why
Ravioli
Refined soft wheat flour
Rolls thinly and seals cleanly
Tagliatelle
Refined flour or a partial whole wheat blend
Needs stretch but can handle more flavor
Pappardelle
Refined flour with 20% to 30% whole wheat
Wide ribbons work well with rustic flavor
Maltagliati
Whole wheat blend
Good for soups, beans and rough-cut pasta
Eggless firm pasta
Durum wheat semolina or semola rimacinata
Better bite and shape holding than ordinary whole wheat flour
If you want whole wheat pasta at home, start with 70% refined flour and 30% whole wheat flour. That gives flavor without making the dough too difficult to roll.
How They Behave In Cakes, Pancakes And Biscuits
Refined wheat flour gives softer cakes, lighter pancakes and more tender biscuits. Whole wheat flour can make those foods heavier, but it also adds flavor.
For cakes, use whole wheat flour carefully. A full replacement can make the crumb dense. For pancakes, muffins and quick breads, whole wheat flour works more easily because those recipes already tolerate a heartier texture.
Easy Substitution Guide
Recipe
Safe Whole Wheat Swap
Tip
Cakes
Up to 25%
Use fine whole wheat flour and avoid overmixing
Pancakes
25% to 50%
Let batter rest before cooking
Muffins
50% or more
Add a little extra liquid if batter feels thick
Biscuits
25% to 40%
Keep butter cold and handle dough lightly
Bread
25% to 100%
Increase hydration and give dough more time
Fresh pasta
20% to 40%
Rest dough longer before rolling
Storage: Whole Wheat Flour Spoils Faster
Whole wheat flour has a shorter shelf life because it includes the germ. The germ contains natural oils, and those oils can turn stale or rancid over time.
Refined flour lasts longer in the pantry because the germ has been removed. Whole wheat flour is better stored in an airtight container, away from heat and light. For longer storage, keep it in the refrigerator or freezer.
Flour Type
Best Storage
Warning Signs
Refined wheat flour
Cool pantry in airtight container
Musty smell, insects, moisture clumps
Whole wheat flour
Fridge or freezer for longer storage
Bitter smell, stale taste, oily or rancid aroma
Before using whole wheat flour, smell it. Fresh whole wheat flour should smell nutty and grain-like. If it smells bitter, sour or oily, replace it.
Can You Substitute Whole Wheat Flour For Wheat Flour?
Yes, but the result changes. Whole wheat flour absorbs more liquid and gives a denser texture. The safest method is to replace only part of the refined flour at first.
For bread, start with 25% to 50%. For pancakes and muffins, 50% works well. For pasta, 20% to 30% is a good starting point. For cakes and delicate pastry, stay lower unless the recipe was written for whole wheat flour.
Whole wheat flour is not just a healthier-looking version of white flour. It behaves like a different ingredient.
Which One Should You Choose?
The best flour is not necessarily the healthiest one, but the one that matches the result you want|Credits: Shutterstock
Choose refined wheat flour when you want lightness, stretch and a mild flavor. Choose whole wheat flour when you want more grain flavor, more fiber and a heartier texture.
For Italian cooking, the answer depends on the dish. Fresh egg pasta usually prefers refined soft wheat flour. Rustic ribbons and country-style doughs can use whole wheat blends. Bread can go either way, depending on whether you want a soft loaf or a fuller grain flavor.
Goal
Better Choice
Reason
Soft cake
Refined wheat flour
Gives a lighter crumb
Rustic bread
Whole wheat flour or blend
Adds flavor and fiber
Fresh ravioli
Refined soft wheat flour
Rolls thinly and seals well
Hearty tagliatelle
Refined flour with some whole wheat
Adds flavor while keeping the dough workable
Everyday pancakes
Blend of both
Balances softness and flavor
Long pantry storage
Refined wheat flour
Keeps longer
For a classic pasta meal, refined flour still has a natural place. For example, tagliatelle al ragù Bolognese benefits from fresh ribbons that roll smoothly and hold sauce without becoming heavy. A small whole wheat blend can work, but the dough needs more rest and careful rolling.
FAQs
Is Wheat Flour The Same As Whole Wheat Flour?
No. Wheat flour on a label usually means refined wheat flour unless the word “whole” appears. Whole wheat flour uses the bran, germ and endosperm. Refined wheat flour is mainly made from the endosperm.
Is Whole Wheat Flour Better For You?
Whole wheat flour naturally contains more fiber because it keeps the bran. It also keeps more of the original grain. That said, the best choice depends on the whole meal, not only the flour.
Can I Replace All-Purpose Flour With Whole Wheat Flour?
Yes, but start with a partial swap. Whole wheat flour absorbs more liquid and makes baked goods denser. A 25% to 50% replacement is a good starting point for many recipes.
Why Does Whole Wheat Dough Feel Dry?
The bran and germ absorb more liquid than refined flour. Let the dough rest before adding too much extra flour, and increase hydration slightly if needed.
Why Does Whole Wheat Flour Taste Stronger?
Whole wheat flour includes bran and germ, which add a nutty, earthy flavor. Refined flour is milder because those parts are removed during milling.
Does Whole Wheat Flour Need Different Storage?
Yes. Whole wheat flour can spoil faster because the germ contains natural oils. Store it airtight, ideally in the fridge or freezer if you will not use it quickly.
Can Whole Wheat Flour Be Used For Pasta?
Yes. It works best as part of a blend, especially for rustic pasta. Use 20% to 30% whole wheat flour with refined flour for easier rolling and a better texture.
Bottom Line
The difference between wheat flour and whole wheat flour is not only color. Whole wheat flour keeps the bran, germ and endosperm. Refined wheat flour keeps mainly the endosperm, which gives it a lighter texture and longer shelf life.
For soft cakes, delicate pasta and light bread, refined wheat flour is easier to use. For fuller flavor, more fiber and rustic breads or pasta blends, whole wheat flour brings more character.
The best kitchen answer is to use both. Refined flour gives smoothness and structure. Whole wheat flour gives flavor and substance. Once you know how each one behaves, the choice becomes less about labels and more about the result you want on the plate.
A pasta maker dusts fresh dough with flour while preparing homemade Italian pasta
Good pasta starts with one thing: the right flour. Sure, a killer sauce can save a lazy weeknight dinner, but the flour you choose is what actually decides how your dough feels, how thin you can roll it, and whether your final plate of pasta has a soft bite or that perfect, firm chew.
If you have ever looked at Italian flour labels, they can seem a bit cryptic compared to standard supermarket bags. You will run into names like tipo 00, tipo 0, tipo 1, tipo 2, integrale, semola di grano duro, and semola rimacinata. Every single one of those tells a story about how the wheat was milled and how it is going to behave under a rolling pin.
To keep it simple: if you want a smooth, silky fresh egg pasta, reach for the tipo 00 or tipo 0. If you are going for a sturdier, firmer bite, especially for those classic water-based shapes from southern Italy, semola or semola rimacinata is your best bet. Once you have got that down, picking out your flour gets a whole lot easier.
That idea fits the way Antonio Carluccio approached pasta: simple ingredients, handled with care. In the Antonio Carluccio guide to fresh egg pasta, the basic dough starts with one large egg for every 115g of flour, with small adjustments depending on the dough. Flour is the first choice that shapes everything after that.
How Italian Flour Labels Work
Italian flour labels explained, from highly refined Tipo 00 to durum wheat semola and semola rimacinata
Italian flour labels are mainly about two things: the type of wheat and the level of refinement.
Soft wheat flour is called farina di grano tenero. Durum wheat flour and semolina come from grano duro, a harder wheat used for pasta with more firmness and bite.
Italian soft wheat flour is classified into types such as 00, 0, 1, 2 and integrale. The official Italian DPR 187/2001 rules classify these flours by mineral content, also called ash content. Tipo 00 is the most refined soft wheat flour, while tipo 1, tipo 2 and integrale contain more of the grain.
A common mistake is to think that 00 always means pasta flour. It does not. The 00 label tells you how refined the flour is. It does not automatically tell you protein level or best use. A 00 flour made for pastry will behave differently from a 00 flour made for pasta or pizza.
Italian Flour Type
What It Means
Best Pasta Use
Tipo 00
Very fine, highly refined soft wheat flour
Fresh egg pasta, ravioli, tortellini, tagliatelle
Tipo 0
Fine soft wheat flour with a little more body
Fresh pasta with slightly firmer texture
Tipo 1
Less refined soft wheat flour
Rustic fresh pasta, usually blended
Tipo 2
More rustic soft wheat flour
Hearty pasta with more grain flavor
Integrale
Whole wheat flour
Whole wheat pasta, best blended with finer flour
Semola di grano duro
Durum wheat semolina
Dried pasta style, rustic pasta, firm dough
Semola rimacinata
Fine re-milled durum wheat semolina
Orecchiette, cavatelli, trofie, eggless pasta
Tipo 00 Flour: The Classic Choice For Fresh Egg Pasta
The finest Italian flour often creates the smoothest and most flexible pasta dough|Shutterstock
Tipo 00 flour is the flour most people associate with fresh Italian pasta. It is very fine, smooth and easy to knead into a silky dough. That makes it excellent for pasta sheets, ribbons and filled pasta.
Fresh egg pasta needs dough that rolls thinly without tearing. Tipo 00 helps with that. It gives ravioli, tortellini and tagliatelle a clean texture, especially when the pasta will be served with butter, sage, ragù, mushroom sauce or a delicate filling.
Best Uses For Tipo 00 Flour
Tagliatelle
Fettuccine
Pappardelle
Ravioli
Tortellini
Lasagne sheets
Agnolotti
Tipo 00 works especially well when the dough needs to be thin and flexible. Filled pasta is the clearest example. Ravioli dough must seal around the filling without cracking, and tipo 00 gives the smoothness needed for that.
For a classic pairing, fresh egg pasta made with tipo 00 is a natural fit for tagliatelle al ragù Bolognese, where the pasta needs enough tenderness to carry the sauce without becoming heavy.
Tipo 0 Flour: A Little More Body In The Dough
Tipo 0 flour is still refined and smooth, but it has a little more body than tipo 00. In pasta dough, that can give a slightly firmer bite and a dough that feels more substantial under the hand.
Many home cooks like tipo 0 for tagliatelle, lasagne sheets and wider pasta ribbons. It is also a practical choice when tipo 00 feels too delicate or when the sauce is heavier.
When To Use Tipo 0 Flour
Use it for fresh pasta with more chew.
Use it for lasagne sheets that need structure.
Use it for wider ribbons served with meat sauce.
Use it as a substitute when tipo 00 is unavailable.
Use it in blends with semola rimacinata for firmer egg pasta.
Tipo 0 is a useful middle ground. It keeps the dough smooth, but gives it a little more resistance. For everyday fresh pasta at home, it can be easier to handle than very soft 00 flour.
Semola Di Grano Duro: The Flour Behind Firm Pasta
Durum wheat remains the foundation of most traditional Italian dried pasta|Shutterstock
Semola di grano duro is durum wheat semolina. It has a firmer structure, a pale golden color and a more granular texture than soft wheat flour.
Durum wheat is closely linked with Italian dried pasta. The Italian DPR 187/2001 rules define pasta categories made from durum wheat semolina and water, including pasta di semola di grano duro and pasta di semola integrale di grano duro. That legal framework helps explain why durum wheat is central to classic Italian dried pasta.
Semolina gives pasta structure. It helps pasta hold shape during drying and boiling. It also gives the finished pasta a firmer bite, especially when compared with soft wheat flour.
Best Uses For Semola Di Grano Duro
Dried pasta style dough
Rustic hand-shaped pasta
Eggless pasta
Firm pasta with more chew
Dusting pasta trays and boards
Semolina also helps prevent sticking when dusted lightly over fresh pasta. It is better for that job than fine soft wheat flour because it stays separate and does not become pasty as quickly.
Semola Rimacinata: The Best Flour For Many Eggless Pasta Shapes
Re-milling semolina creates a finer flour that is easier to shape into handmade pasta|Shutterstock
Semola rimacinata is re-milled durum wheat semolina. It comes from the same hard wheat family as semolina, but it is ground finer. That makes it easier to knead, shape and hydrate.
For home pasta, semola rimacinata is one of the most useful flours to keep in the kitchen. It is ideal for southern Italian pasta shapes made from flour and water, without eggs.
Best Uses For Semola Rimacinata
Orecchiette
Cavatelli
Trofie
Strascinati
Malloreddus
Gnocchetti sardi
Water-based pasta dough
Semola rimacinata dough feels firmer than egg pasta. It needs a little patience. Warm water helps the flour hydrate, and resting the dough makes shaping easier.
A simple starting ratio is two parts semola rimacinata to one part warm water by weight. After kneading, the dough should rest until it feels smoother and easier to work.
Problem With The Dough
Likely Cause
What To Do
Dough cracks at the edges
Too dry or under-rested
Add a few drops of water, knead again and rest covered
Dough feels sticky
Too much water or not enough rest
Add a little semola and rest before shaping
Dough springs back
Gluten needs time to relax
Cover and rest for another 20 to 30 minutes
Shapes collapse in cooking
Dough too soft or under-kneaded
Use less water and knead longer next time
Tipo 1, Tipo 2 And Integrale: Rustic Flour With More Flavor
Tipo 1, tipo 2 and integrale flours contain more of the wheat character than 00 or 0. They bring deeper flavor, more color and a rougher texture.
In pasta, rustic flour can be wonderful, but it needs care. Whole wheat and less refined flours can make dough harder to roll and more likely to tear. For that reason, they usually work best in blends.
Useful Flour Blends For Rustic Pasta
Blend
Best Use
Result
70% tipo 00, 30% tipo 1
Fresh egg tagliatelle
More flavor while keeping the dough easy to roll
60% tipo 0, 40% tipo 2
Rustic wide ribbons
More texture and better fit for heavier sauces
80% tipo 00, 20% integrale
Filled pasta with a rustic edge
Slightly nutty flavor without making the dough too rough
50% semola rimacinata, 50% integrale
Hearty eggless pasta
Firm dough with more grain character
Rustic flour pairs well with mushrooms, sausage, beans, lentils, bitter greens, tomato sauces and slow-cooked meat sauces. For delicate fillings or very thin ravioli, tipo 00 remains the easier choice.
All-Purpose Flour: Can You Use It For Pasta?
Fresh pasta can be made successfully with all-purpose flour, though texture will differ|Shutterstock
All-purpose flour can make fresh pasta. Many home cooks use it because it is easy to find and affordable. With eggs, it can make a workable dough for simple ribbons or sheets.
The difference appears in texture. All-purpose flour usually gives a softer result than semolina or Italian pasta flour. That can be fine for a first attempt at pasta, but it will not give the same bite as semola rimacinata or durum wheat semolina.
How To Improve All-Purpose Flour Pasta
Add 20% to 30% semola rimacinata for more bite.
Rest the dough before rolling.
Use eggs for structure if making fresh sheets or ribbons.
Avoid too much extra flour while rolling.
Use the dough for simple shapes before trying filled pasta.
A good beginner blend is 70% all-purpose flour and 30% semola rimacinata. It gives more firmness while staying easier to handle than 100% durum wheat dough.
Which Flour Works Best For Each Pasta Shape?
The shape should guide the flour choice. Thin ravioli needs smooth dough. Orecchiette needs firm dough. Tagliatelle needs enough elasticity to roll thinly and enough body to hold sauce.
Pasta Shape
Best Flour
Why It Works
Tagliatelle
Tipo 00 or tipo 0
Rolls well and holds rich sauces
Pappardelle
Tipo 0 or tipo 00 with some semola rimacinata
Gives wider ribbons more bite
Ravioli
Tipo 00
Rolls thinly and seals cleanly
Tortellini
Tipo 00
Stays flexible for folding and shaping
Lasagne
Tipo 00 or tipo 0
Creates smooth sheets that layer neatly
Orecchiette
Semola rimacinata
Holds the small ear shape during cooking
Cavatelli
Semola rimacinata
Works well for dragged pasta shapes
Maltagliati
Tipo 0, tipo 1 or mixed flour
Fits soups, beans and rustic sauces
For more inspiration around pasta shapes and uses, the Antonio Carluccio page for Passion for Pasta is a helpful internal reference because it frames pasta as a world of shapes, textures and sauces rather than a single dough formula.
How Much Semolina Should You Add To Egg Pasta?
Adding semolina or semola rimacinata to egg pasta gives more bite. The amount depends on the pasta shape.
Flour Blend
Best For
Texture
100% tipo 00
Ravioli, tortellini, delicate sheets
Smooth and flexible
80% tipo 00, 20% semola rimacinata
Tagliatelle, fettuccine, lasagne
Slightly firmer but still easy to roll
70% tipo 00, 30% semola rimacinata
Pappardelle and sturdier ribbons
More chew and firmer bite
50% tipo 00, 50% semola rimacinata
Rustic egg pasta
Firmer dough that needs more rest
100% semola rimacinata
Eggless pasta shapes
Firm, springy dough
For filled pasta, keep the semolina lower. Dough for ravioli and tortellini needs to fold and seal without becoming too firm. For ribbons, especially those served with meat sauce, a higher share of semolina can work very well.
Why Resting The Dough Changes The Result
Resting allows flour to fully hydrate and makes dough easier to roll and shape|Shutterstock
Resting is one of the simplest ways to improve pasta dough. After kneading, flour continues to absorb liquid and the dough relaxes. A dough that feels rough at first can become much smoother after half an hour.
Fresh egg pasta usually needs at least 30 minutes of rest. Semola rimacinata dough also benefits from rest because durum wheat absorbs water more slowly. If the dough feels tight, cover it and wait before adding more liquid.
A finished pasta dough should feel firm, smooth and elastic. It should not crumble at the edges, stick heavily to the table or pull back aggressively when rolled.
Common Pasta Flour Mistakes
Most pasta flour mistakes come from matching the wrong flour with the wrong shape. The flour may be good, but the result still suffers when it is used for the wrong job.
Using coarse semolina for delicate ravioli sheets.
Using only soft wheat flour for southern eggless pasta shapes.
Buying tipo 00 without checking whether it is made for pasta, pizza or pastry.
Adding too much flour while rolling.
Skipping the resting time.
Using whole wheat flour alone and expecting a smooth, flexible dough.
Adding all the water at once instead of adjusting gradually.
The fix is simple: choose flour by pasta style, add liquid slowly, knead properly and rest the dough before judging it.
Italian Pasta Flour Buying Guide
When buying flour for pasta, look beyond the front label. Wheat type, texture and intended use are more useful than the most decorative packaging.
Label Wording
What It Means
Best Use
Tipo 00
Very fine soft wheat flour
Fresh egg pasta and filled pasta
Tipo 00 pasta flour
Fine flour milled or selected for pasta
Egg pasta, lasagne, ravioli
Tipo 0
Fine soft wheat flour with more body
Fresh pasta with firmer texture
Semola di grano duro
Durum wheat semolina
Firm pasta and dried pasta style dough
Semola rimacinata
Fine re-milled durum semolina
Orecchiette, cavatelli, trofie
Integrale
Whole wheat flour
Rustic pasta, best used in blends
For a small home pasta pantry, three flours cover most needs: tipo 00 for fresh egg pasta, semola rimacinata for eggless shapes, and a rustic flour such as tipo 1, tipo 2 or integrale for blended doughs.
Simple Pasta Flour Formulas To Start With
Exact absorption changes with flour brand, humidity, egg size and room temperature. Use these formulas as starting points, then adjust by touch.
Pasta Dough
Flour Formula
Liquid
Best Use
Classic egg pasta
100% tipo 00
1 large egg per 100g to 115g flour
Tagliatelle, ravioli, lasagne
Egg pasta with bite
80% tipo 00, 20% semola rimacinata
Eggs, with tiny water adjustment if needed
Fettuccine, pappardelle
Water-based southern pasta
100% semola rimacinata
About 50% warm water by flour weight
Orecchiette, cavatelli
Rustic egg pasta
70% tipo 0, 30% tipo 1
Eggs
Tagliatelle for hearty sauces
Whole wheat blend
70% tipo 00, 30% integrale
Eggs, with small water adjustment if needed
Rustic ribbons and soups
Touch tells you more than the formula. Sticky dough needs a little flour. Cracked dough needs a little water, more kneading or more rest. Smooth, firm dough is the goal.
FAQs
Is Tipo 00 Always The Best Flour For Pasta?
No. Tipo 00 is excellent for fresh egg pasta, ravioli and tortellini. Semola rimacinata works better for many eggless southern shapes, while durum wheat semolina is better for firm pasta and dried pasta style dough.
What Is The Difference Between Semolina And Semola Rimacinata?
Semolina is durum wheat with a more granular texture. Semola rimacinata is re-milled semolina with a finer texture. For home pasta making, semola rimacinata is usually easier to knead and shape.
Can I Make Pasta With All-Purpose Flour?
Yes. All-purpose flour can make basic fresh egg pasta. The result will usually be softer and less firm than pasta made with tipo 00, semolina or semola rimacinata.
Which Flour Is Best For Ravioli?
Tipo 00 is usually best for ravioli because it rolls thinly and seals cleanly around the filling. A small amount of semola rimacinata can add bite, but too much can make the dough harder to close.
Which Flour Is Best For Orecchiette?
Semola rimacinata is the best choice for orecchiette. It gives the dough firmness, chew and enough structure to hold the shape in boiling water.
Does Tipo 00 Mean High Gluten?
No. Tipo 00 refers to the refinement level, not automatically to gluten strength. Check the protein level and intended use on the bag before choosing it for pasta.
Why Does Pasta Dough Crack?
Cracking usually means the dough is too dry, under-kneaded or under-rested. Cover it, let it rest, then knead again with a few drops of water if needed.
Bottom Line
Italian pasta flour becomes easier to understand once you separate soft wheat from durum wheat. Tipo 00 and tipo 0 are the natural choices for smooth fresh egg pasta. Semola rimacinata is ideal for eggless shapes such as orecchiette and cavatelli. Semola di grano duro gives pasta the firmer bite linked with classic dried pasta.
The best flour depends on the pasta shape. Ravioli needs smooth dough. Tagliatelle needs elasticity. Orecchiette needs firmness. Rustic pasta needs more grain flavor. Choose the flour for the shape first, then adjust the liquid and resting time until the dough feels right under your hands.
No label can replace touch. Flour gives the starting point, but good pasta comes from small adjustments: a little more rest, a little less flour on the board, a little more kneading, and enough patience to let the dough tell you what it needs.
Antonio Carluccio was never only a celebrity chef. He was a writer, restaurateur, shopkeeper, mushroom hunter, television personality and one of the people who helped Britain understand Italian food beyond red sauce and heavy plates of pasta.
He was born in Vietri sul Mare, on the Amalfi Coast, on April 19, 1937, and died in London on November 8, 2017, at the age of 80. By the time he died, Carluccio had become one of the most recognizable Italian food figures in Britain, with restaurants, books, television programs and a public image built around regional cooking, good ingredients and plain-spoken warmth.
The Wealth Antonio Carluccio Left Behind
Success in food often extends far beyond the kitchen
An estimated net worth is $100 million. That figure should be treated as an estimate, not a confirmed estate value. Carluccio was a private individual, and there is no widely cited public filing that proves an exact personal fortune.
The estimate is still understandable when looking at his career. Carluccio built wealth from restaurants, books, television, consulting, food retail and the brand that carried his name. The largest business connection was the Carluccio restaurant and food-shop chain, which began from a deli idea and later became a well-known high-street name.
The company value and Carluccio personal wealth should not be treated as the same thing. A brand can be valued highly while the founder personal holding changes over time through investors, sales, directorship changes, consulting roles and ownership restructuring.
For readers looking for the safest answer, the clean version is this: Antonio Carluccio was a highly successful chef and businessman, and published net-worth estimates place him in the multi-millionaire category, but the exact personal figure remains unverified.
Early Life In Italy
Carluccio grew up with a deep connection to food before it became a career. The official Antonio Carluccio biography says he was born on the Amalfi Coast and later raised in the wooded north-west of Italy, where his interest in mushrooms and foraging began at a young age.
That detail matters because mushrooms became one of his lifelong passions. He was not a chef who learned Italian cooking only through restaurant technique. His knowledge came from regions, seasons, forests, markets and family food culture.
Before becoming a major food figure in Britain, Carluccio lived in Vienna, Germany and other parts of Europe. He worked with languages and wine before settling into the food world that would define his public life.
From Wine Merchant To London Restaurateur
Carluccio arrived in the United Kingdom in the 1970s and first worked in Italian wine. That background gave him a practical understanding of regional Italy at a time when many British diners still had a narrow idea of Italian food.
His major London chapter began at Neal Street Restaurant in Covent Garden. The official biography says he took over Neal Street in 1981, and the restaurant traded for 26 years. It became one of the key London places for Italian food, not because it was flashy, but because it treated regional dishes, ingredients and wine as the main story.
Neal Street also became part of British food history because it helped shape younger chefs. Our earlier article on how Antonio Carluccio influenced Jamie Oliver explains how Jamie Oliver worked there early in his career and how Gennaro Contaldo became part of the same culinary line.
The Birth Of The Carluccio Brand
In 1991, Antonio and Priscilla Carluccio opened an Italian food shop on Neal Street. The idea was simple but powerful: sell proper Italian ingredients, make them understandable to British shoppers, and bring restaurant knowledge into retail.
The Carluccio brand history describes the shop as the starting point for a business built on regional Italian products and carefully sourced ingredients. In 1998, the first Carluccio Caffè opened in Market Place, London, according to the official Antonio Carluccio biography.
The model worked because it joined three things British diners wanted at the time: a casual restaurant, a deli-style shop and a trusted Italian name. It was accessible without being careless. People could eat pasta, buy oil, take home jars and feel closer to the food culture Carluccio had spent years explaining.
By 2010, the Carluccio business had grown into a valuable restaurant group. Public reports at the time placed the Landmark Group takeover value at about £90 million. That figure shows the strength of the brand, although it should not be confused with Carluccio personal net worth.
Books, Television And The Public Antonio
Carluccio wrote widely about Italian food, with books covering pasta, mushrooms, regional cooking, vegetables and home-style recipes. Our guide to Antonio Carluccio books gives a closer look at his publishing work and why his writing still matters to readers who want more than celebrity-chef branding.
His television work made him familiar to a wider audience. He appeared on BBC food programs and later became especially loved for Two Greedy Italians, the BBC series he made with Gennaro Contaldo. The program worked because the two men were not only cooking. They were arguing, remembering, laughing and looking at the Italy they had left behind.
That combination suited Carluccio. He could be scholarly about mushrooms and regional food, then suddenly become funny, sharp or tender. His public style was part teacher, part uncle, part old-world restaurateur.
Why People Called Him The Godfather Of Italian Gastronomy
The nickname followed Carluccio because he made Italian food feel both serious and approachable. He did not present it as luxury theater. He presented it as culture, memory, ingredients and technique.
At a time when Italian food abroad could easily be reduced to pizza, pasta and red sauce, Carluccio insisted on regional difference. Piedmont was not Sicily. Campania was not Emilia-Romagna. Mushrooms, olive oil, pasta shapes, cured meats, cheeses, herbs and seasonal vegetables all had stories.
That was his lasting contribution. He made people curious. He pushed British diners and home cooks to look past generic Italian food and ask better questions about where a dish came from and why it was cooked that way.
Awards And Honours
Carluccio received major recognition from both Italy and Britain. The Italian government awarded him the Commendatore Ordine al Merito della Repubblica Italiana in 1998 for his contribution to Italian food. In 2007, he was appointed an honorary OBE for services to the catering industry.
He also received the AA Lifetime Achievement Award in 2012, recognizing a career that had moved through restaurants, books, television, food retail and mentorship.
The honours mattered because they showed how widely his work was understood. Carluccio was not only a restaurant operator. He became a cultural ambassador for Italian food.
Personal Life
Carluccio was married three times. His third wife was Priscilla Conran, with whom he built an important part of the business story around Neal Street and the Carluccio shop.
His later years were not without difficulty. He spoke publicly about depression and personal struggle, and his autobiography A Recipe for Life gave readers a more honest look at the man behind the public warmth.
Antonio Carluccio shared his culinary philosophy through restaurants, books, and decades of food education
That honesty is part of why people still respond to him. He did not fit the polished celebrity-chef mold. He could be charming, stubborn, generous and deeply serious about food, sometimes all in the same appearance.
Death And Funeral
Antonio Carluccio died on November 8, 2017. Contemporary reports described him as one of the great figures of Italian cooking in Britain, and tributes came from chefs, restaurateurs, broadcasters and diners who had grown up with his work.
The strongest tributes focused less on fame and more on influence: the chefs he helped, the ingredients he championed, the books he left, and the way he gave Italian food a fuller voice in Britain.
The Archive That Keeps His Work Alive
Carluccio legacy is also preserved beyond restaurants and television clips. The Antonio Carluccio Library and Archive at Oxford Brookes University contains his published works and personal culinary library, with a collection especially rich in regional Italian food, foraging and mushrooms.
The Antonio Carluccio Foundation says the archive includes more than 800 books, mementos, sketches and notes connected to his life and work.
That archive is important because Carluccio was not only a television personality. His knowledge lived in notes, books, recipes, menus and research. Preserving that material keeps the serious food scholar visible behind the famous name.
What Antonio Carluccio Left Behind
Part Of His Legacy
Why It Matters
Neal Street Restaurant
Helped define serious Italian dining in London and shaped chefs who came after him.
Carluccio brand
Brought Italian food retail and casual dining to a wide British audience.
Cookbooks
Recorded his knowledge of pasta, mushrooms, vegetables and regional Italian food.
Television
Made his personality and food philosophy familiar beyond restaurant diners.
Mentorship
Linked figures such as Gennaro Contaldo and Jamie Oliver to a wider Italian cooking tradition.
Archive
Preserves his research, books and culinary notes for future readers and scholars.
FAQ About Antonio Carluccio
What Was Antonio Carluccio Net Worth?
Published online estimates often place Antonio Carluccio net worth around $100 million, but that figure is not officially confirmed. His wealth came from restaurants, food retail, books, television and consulting.
Why Was Antonio Carluccio Famous?
He was famous for Italian cooking, Neal Street Restaurant, the Carluccio brand, cookbooks, television appearances and his partnership with Gennaro Contaldo on Two Greedy Italians.
Was Antonio Carluccio Connected To Jamie Oliver?
Yes. Jamie Oliver worked at Neal Street Restaurant early in his career, and Carluccio influence reached him through that kitchen and through Gennaro Contaldo.
What Was Antonio Carluccio Best Known For Cooking?
He was best known for regional Italian cooking, pasta, mushrooms, vegetables and simple dishes built around good ingredients rather than heavy presentation.
Did Antonio Carluccio Found Carluccio Restaurants?
Yes. The business began with an Italian food shop opened by Antonio and Priscilla Carluccio in 1991, followed by the first Carluccio Caffè in London in 1998.
Where Is Antonio Carluccio Archive?
The Antonio Carluccio Library and Archive is held at Oxford Brookes University, where his books, notes and culinary materials are preserved.
Bottom Line
Antonio Carluccio net worth is difficult to prove with certainty, but his influence is much easier to measure. He built restaurants, wrote important books, helped create a major Italian food brand and taught British audiences to look at Italian cooking with more curiosity and respect.
His finest legacy is not a number. It is the way he made Italian food feel rooted, regional and human. That is why the name Carluccio still carries weight years after his death.
Few foods spark as many fierce arguments as pizza. Most people obsess over the crisp of the crust or the stretch of the cheese, but it is the sauce that actually dictates the success of the pie.
A good sauce keeps the crust crisp. Too much sauce, or the wrong kind, just makes the whole thing soggy before the cheese can even brown.
Every great pizza relies on the same core blueprint: dough, sauce, cheese, and toppings.
While mozzarella is the gold standard, and toppings can range from classic pepperoni to controversial pineapples, the sauce acts as the crucial foundation holding it all together.
Because it lives beneath the surface, knowing the exact difference between a dedicated pizza sauce and a standard marinara will completely change how your next homemade pie turns out.
What Is the Difference Between Pizza Sauce and Marinara?
Marinara is a specific tomato sauce, usually cooked and served with pasta, seafood, meatballs, or as a dipping sauce. Pizza sauce is broader. It can refer to almost any sauce spread over pizza dough, although most people use the term for a tomato-based sauce.
The main difference comes down to texture, cooking time, and purpose. Marinara is usually cooked until the tomatoes break down and the sauce becomes thicker and more developed. Pizza sauce is often left raw or only briefly cooked because it continues cooking in the oven on top of the dough.
Simplicity helped pizza become one of the world’s most recognized foods|Image credit: shutterstock
Marinara usually has a fuller flavor because it spends more time in the pan with garlic, olive oil, herbs, and tomatoes. Pizza sauce needs to be simpler and more controlled. It has to sit under cheese and toppings without stealing attention or soaking the crust.
Traditional pizza sauce was often little more than crushed or ground tomatoes with salt, olive oil, and a small amount of seasoning. The oven did the cooking. Today, many cooks use cooked pizza sauce, especially for thicker styles of pizza or home ovens that do not reach the heat of a professional pizza oven.
Marinara and pizza sauce can be swapped in some situations, but they do not behave the same way. Marinara on pizza gives a richer, more cooked tomato flavor. Pizza sauce on pasta can taste thin unless it is reduced and seasoned more heavily.
The Origin of Pizza and Pizza Sauce
Pizza as we know it is closely tied to Naples. In June 1889, Neapolitan chef Raffaele Esposito prepared a tomato-based pizza for Queen Margherita of Savoy. The pizza was topped with tomatoes, mozzarella, and basil, ingredients that matched the colors of the Italian flag. That style became known as Margarita.
Tomato sauce became a natural partner for pizza because it brought acidity, moisture, and sweetness to a simple dough. In Naples, where pizza developed as an affordable street food, the sauce had to be quick, practical, and full of flavor without expensive ingredients.
The Origin of Marinara Sauce
Many classic recipes began as practical solutions with simple ingredients|Image credit: shutterstock
Tomato sauces vary from kitchen to kitchen, and marinara is no exception.
One cook may use onion, another may leave it out. One may add oregano, another may prefer basil. The basic idea stays the same: tomatoes, olive oil, garlic, herbs, and enough cooking time to bring everything together.
Like many Italian classics, marinara has roots in Naples. Tomato sauce could not exist in Italy before tomatoes arrived in Europe after the Spanish brought them from the Americas in the 16th century. Italian cooks adopted tomatoes gradually, then built a whole cuisine around them.
One of the Italian chefs, Antonio Latini, published an early tomato sauce recipe in his cookbook, helping move tomatoes from curiosity to kitchen staple.
The word marinara is often linked to sailors and coastal cooking. A simple Italian-style marinara usually includes olive oil, garlic, tomatoes, herbs, and sometimes onion. Canned tomatoes are often better than fresh tomatoes for sauce because they are picked and packed at a ripe stage, with steady sweetness and acidity.
Warm the olive oil in a saucepan over medium heat. Add the onion and garlic, then cook for about two minutes, until the onion softens and the garlic smells fragrant. Add the dried herbs, tomatoes, and sugar. Bring the sauce to a gentle boil, then lower the heat and simmer for about 30 minutes, stirring from time to time. Season with salt and pepper at the end.
Pizza Sauce Recipe
Ingredients:
4 tablespoons of extra virgin olive oil
3 garlic cloves, crushed
1 large can of Italian tomatoes
1 teaspoon of sugar, if needed
Oregano, basil, or another herb you like
Salt and pepper to taste
Method
Heat the olive oil in a saucepan. Add the garlic and cook briefly, just until fragrant. Add the tomatoes, herbs, sugar, salt, and pepper. Bring the sauce to a simmer and cook for about 10 minutes. For a smoother pizza sauce, blend it lightly. For a more rustic pizza, crush the tomatoes by hand and keep some texture.
Can You Replace Marinara with Pizza Sauce (or Vice Versa)?
When you cook Italian food at home, sauce substitutions happen. You may start pasta and realize the marinara is gone. You may roll out pizza dough and find only a jar of pasta sauce in the fridge. In many kitchens, that is where the debate starts.
Marinara and pizza sauce share the same tomato base, so one can be adjusted into the other. The result depends on texture and seasoning. A sauce that works over spaghetti may be too wet for pizza. A sauce made for pizza may taste too plain over pasta unless it is cooked longer and seasoned more fully.
The Similarities Between Pizza Sauce and Marinara
Pizza sauce and marinara look similar because both are usually tomato-based. They also rely on many of the same ingredients: tomatoes, olive oil, garlic, herbs, salt, and pepper.
Both sauces can be smooth or rustic. Both can be made with canned tomatoes. Both can work with mozzarella, basil, Parmesan, and plenty of classic Italian dishes. That overlap explains why home cooks swap them so often.
The Differences Between Pizza Sauce and Marinara
The biggest differences are simple:
consistency
flavor
cooking process
Marinara is usually thicker and more developed because it is cooked before serving. It can have small tomato pieces, softened onion, garlic, and herbs. Since it is served with pasta or as a sauce on the side, it can carry more flavor on its own.
Pizza sauce has a different job. It needs to spread easily over dough, sit under cheese, and cook in the oven without making the crust soggy. For that reason, pizza sauce is often simpler, smoother, and less reduced than marinara.
Substitution is possible, but the sauce should be adjusted first. Marinara may need thinning or blending for pizza. Pizza sauce may need simmering and extra seasoning for pasta.
The Italian Way
Traditional Italian cooking values flexibility over strict rules|Image credit: shutterstock
In many Italian kitchens, the difference is less dramatic than people make it sound. A basic tomato sauce, often called sugo, can become several things depending on how it is finished.
For pizza, the sauce may be kept lighter and spread thinly. For spaghetti or other pasta, the same tomato base can be cooked longer, enriched with herbs, or finished with pasta water. The point is practical cooking, not strict labels.
Italian food often works that way. A good base sauce gives you room to adjust texture, seasoning, and use.
From Pizza Sauce to Marinara
To turn pizza sauce into marinara, cook it longer. A low simmer removes extra water and gives the tomatoes a richer flavor. Add garlic, basil, oregano, onion, celery, or bay leaf if the sauce tastes too plain. For a classic version, see this guide to making marinara.
Keep stirring as the sauce reduces. Once it coats the back of a spoon and tastes rounded rather than sharp, it is ready for pasta.
You can also finish almost cooked spaghetti directly in the sauce. The pasta releases starch, the sauce tightens, and the two come together better than they would if mixed at the end.
From Marinara to Pizza Sauce
Turning marinara into pizza sauce is usually easier. Blend it if the texture is too chunky, then simmer it briefly if it feels watery. For a thicker sauce, add a small spoonful of tomato paste. For a lighter sauce, loosen it with crushed tomatoes or a small amount of tomato juice.
Use less sauce than you think. A heavy layer of marinara can make pizza soggy, especially in a home oven.
Can You Use Spaghetti Sauce as Pizza Sauce?
You can use spaghetti sauce as pizza sauce, but it usually needs a small adjustment. If the sauce is thin, simmer it until thicker. If it contains large vegetable pieces, blend it or chop the pieces smaller. If it tastes too sweet for pizza, add salt, oregano, garlic, or a little olive oil to bring it back into balance.
Pizza Sauce vs. Spaghetti Sauce
Pizza sauce and spaghetti sauce are both tomato-based, but they are designed for different cooking conditions. Pizza sauce sits on dough and bakes under high heat. Spaghetti sauce coats cooked pasta and usually spends more time simmering in a pan.
Pizza sauce is usually thicker than many spaghetti sauces because it needs to stay on the dough.
Pizza sauce often has oregano, garlic, chili flakes, or other bold seasonings that can stand up to cheese and toppings.
Pizza sauce may include grated Parmesan, while pasta sauce may use cheese at the end or allow it to melt into the finished dish.
Pizza sauce can taste slightly sweeter, especially when sugar is added to soften tomato acidity.
Pasta sauce can have more layered flavor from longer cooking, onion, carrot, celery, peppers, or caramelized vegetables.
Pizza sauce is often added to the pizza before it has been fully cooked, while spaghetti sauce is usually cooked before serving.
The closest pasta sauce to a classic pizza sauce is marinara, which is why the two are so often confused. Some pizzerias also serve marinara as a dipping sauce for crusts or offer it as a topping sauce.
Which Sauce Is Best for Pizza?
Tomato sauce is the classic choice for pizza because it balances cheese, dough, and toppings. Still, pizza does not have to be limited to tomatoes. White sauce, pesto, garlic oil, and cheese-based sauces can all work when the toppings are chosen carefully.
For a simple alternative, white sauce is one of the easiest options.
White Sauce
Alternative sauces can completely change the character of a pizza|Image credit: shutterstock
White sauce is usually made with milk, Parmesan, onion, garlic, butter, flour, herbs, salt, and pepper. Cream can replace milk for a richer version. Flour is mainly used for thickening, so it can be reduced or skipped when using cream.
White sauce works well with mushrooms, chicken, spinach, onions, mild cheeses, and herbs. Since it is richer than tomato sauce, a thin layer is enough.
The Best Cheese for Pizza
Cheese gives pizza its melt, texture, and much of its flavor. Mozzarella is the classic choice, but blue cheese, Parmesan, provolone, and other cheeses can work when used in the right amount.
For pizza, avoid cheeses that release too much fat or water during baking. Too much fat can leave the surface oily, while too much moisture can soften the crust. Cold cheese is easier to grate, slice, and scatter evenly. For a 30 cm pizza, around 150 g of cheese is usually enough.
Mozzarella
Moisture control is one of the secrets to better homemade pizza|Image credit: shutterstock
Mozzarella is the classic Italian pizza cheese. Buffalo mozzarella is especially prized for its rich flavor, while cow milk mozzarella is more common and easier to find.
Fresh mozzarella can release water during baking, which may leave the dough soft. To avoid that, slice it and pat it with kitchen paper before using. You can also let it drain in a sieve for a short time. Low-moisture mozzarella gives a drier, more even melt, which is useful for home ovens.
Noble Mold Cheese
Blue cheeses such as Gorgonzola or Roquefort can work beautifully on pizza, especially with fresh vegetables, rocket, cherry tomatoes, pears, walnuts, or mild mozzarella. Their flavor is bold, so a small amount is enough.
Blue cheese also works well on white pizzas without tomato sauce. It can be added to béchamel or scattered over the pizza before baking. The best result usually comes from using it as an accent rather than the main cheese.
Pizza sauce and marinara are close relatives, but they are not identical. Marinara is usually cooked, thicker, and more complete on its own. Pizza sauce is usually simpler and built to bake on dough. Once you understand that difference, swapping one for the other becomes easy.
FAQs
Is pizza sauce supposed to be cooked before baking?
Pizza sauce does not always need to be cooked before baking. For a classic thin pizza, crushed tomatoes with olive oil, salt, and herbs can go straight onto the dough because the sauce cooks in the oven. In a home oven, a briefly simmered sauce can work better when the tomatoes taste too sharp or watery.
Why does pizza sauce make the crust soggy?
Pizza sauce can make the crust soggy when it is too watery, spread too thickly, or placed on dough that is too thin for the amount of topping. A small amount of thicker sauce gives a better result. If the sauce looks loose, simmer it for a few minutes before using it.
Should pizza sauce be smooth or chunky?
Pizza sauce can be smooth or slightly textured, but large tomato pieces are harder to spread evenly. A smoother sauce gives better coverage on thin pizza, while a rustic sauce can work on thicker crusts. The best texture is one that spreads easily without pooling on the dough.
Can you use passata for pizza sauce?
Passata works well for pizza sauce because it is already smooth and easy to spread. Season it with olive oil, salt, oregano, garlic, or basil, then use a thin layer on the dough. If the passata tastes too watery, simmer it briefly or stir in a small amount of tomato paste.
How much sauce should you put on a pizza?
For a 30 cm pizza, 2 to 3 tablespoons of sauce is usually enough. The dough should be covered lightly, with no thick puddles of sauce. Too much sauce can soften the crust and hide the flavor of the cheese and toppings.
Conclusion
Pizza sauce and marinara come from the same tomato family, but they have different jobs in the kitchen. Marinara is usually cooked longer, thicker, and more complete as a sauce for pasta or dipping. Pizza sauce needs to spread easily, bake well, and support the crust, cheese, and toppings without taking over.
When you understand the difference, you do not need to treat the two sauces as strict opposites. A thin pizza sauce can become marinara with more cooking and seasoning. A thick marinara can become pizza sauce with a smoother texture and a lighter hand on the dough. The best choice depends on the dish in front of you.
Delicious Chicago Italian beef sandwich with slow cooked beef and Giardanarra close-up on a wooden tray on the table
SOurce: Shutterstock
The quick answer: The best sides for Italian beef sandwiches are ones that cut the richness or add crunch. Lead with the Chicago classic – French fries – then add something bright and acidic. Top picks:
French fries (crinkle-cut hold up best to the jus) – the traditional pairing
Giardiniera or sweet peppers on the side for tangy, spicy crunch
A sharp Italian chopped salad or vinegary coleslaw to balance the fat
Italian street corn or roasted vegetables / broccoli rabe for a cookout
A chocolate cake shake for dessert – the authentic Chicago finish
Keep reading for all 15 sides, what to skip, and the drink and dessert pairings.
There is a particular kind of silence that falls over a table when a tray of Italian beef sandwiches lands in the middle of it. Everyone reaches, everyone drips jus down their wrists, and for about ninety seconds nobody talks.
I’ve watched it happen at a cousin’s backyard party in the suburbs and at a paper-lined counter in Chicago, and the reaction is always the same.
But here’s the thing nobody warns you about: the Italian beef is so good, and so rich, that the wrong side dish can quietly sink the whole meal. Serve something heavy next to it and you’ll feel like you need a nap before dessert. Serve nothing at all and the plate feels unfinished.
I’ve cooked for a lot of these dinners, eaten my share in Chicago, and made plenty of mistakes along the way (more on those later). So instead of dumping forty random recipes on you, I want to walk through why certain sides work, then give you the ones I actually reach for – including a few the internet sleeps on.
If you’ve never had one, the Italian beef sandwich is a Chicago invention: thinly sliced roast beef simmered and served in its own garlicky gravy (the “jus”), piled onto a crusty roll. You order it “dry,” “wet,” or “dipped,” and it comes topped with either sweet peppers or spicy giardiniera – a pickled, oil-cured vegetable relish that gives the sandwich its crunch and bite.
So the flavor profile you’re working against is: rich, salty, beefy, garlicky, and dripping wet. A good side does at least one of three jobs:
Cuts the richness with acid or freshness (vinegar, lemon, pickled things, crisp greens).
Adds a different texture — because the sandwich itself is soft and saucy, you crave crunch.
Leans into the Chicago tradition and just doubles down on the fun (yes, that means fries).
Keep those three jobs in mind and you’ll never pair badly again. Now, the sides.
My honest take after years of doing this: fries are the correct answer, but the style matters more than people admit.
Crinkle-cut (the Portillo’s school) hold up to dunking and have more surface area for salt. My personal favorite for a wet sandwich.
Cheese fries with crispy potato-skin edges (Al’s #1 is famous for these) are gloriously over-the-top — best reserved for when you’ve skipped the giardiniera and want richness on richness.
Sweet potato fries are the contrarian pick I’ve come around on. The natural sweetness plays beautifully against the salty beef, and they feel a touch lighter.
Pro move I swear by: save a small ramekin of the leftover jus and dip your fries in it. People will look at you like you’ve invented something. You haven’t — but you’ll be glad you did it.
The Chicago “combo” move: add an Italian sausage
This isn’t really a side, but it’s the most authentic upgrade on the list, so it earns a spot. In Chicago you can order a “combo,” which tucks a char-grilled Italian sausage right alongside the beef in the same roll.
If you’re cooking for a crowd, grill a few sausages and set them out so people can build a combo or eat one on the side. It’s smoky, it’s a little spicy, and it makes the spread feel like a genuine Chicago beef stand.
Giardiniera and sweet peppers — on the side, not just on top
Giardiniera usually lives on the sandwich, but I always put an extra bowl on the table, and it’s the first thing to disappear. That tangy, spicy crunch is exactly the acid-and-texture contrast a rich beef needs.
If you want to make your own – which I highly recommend – Food Network’s homemade giardiniera is a reliable starting point, and a jar keeps in the fridge for weeks.
A bowl of warm, soft sautéed sweet bell peppers does the same job for anyone who doesn’t want heat. Slick them with a little olive oil and good Italian herbs and you’ve got a side that quietly elevates every bite.
Tangy coleslaw
If I could only put one “real” side dish next to an Italian beef, it might be slaw. Not the sweet, mayonnaise-drowned kind — I mean a sharp, vinegary slaw, or better yet a buttermilk-and-horseradish version. The cold crunch and the acidity reset your palate between bites. It’s the cooling counterweight the whole plate is asking for.
Bright Italian salads (the smartest pairing)
This is where I think most people under-deliver. A cold, acidic salad is the single best way to make a heavy beef dinner feel balanced instead of brutal.
Italian chopped / antipasto salad — salami, provolone, olives, pepperoncini, tomatoes, and a red wine vinaigrette. It echoes the flavors of the sandwich without competing. If you want to turn it into a centerpiece, build out a full Italian antipasto board and let people graze.
Simple green salad with lemon vinaigrette — the minimalist’s choice. Sharp lemon and good olive oil do all the work. Browse a few ideas in the salad recipes here if you want inspiration.
Caprese salad — ripe tomatoes, fresh mozzarella, basil, a thread of balsamic. Light, pretty, and it leans into the Italian theme. A reader-favorite move is finishing it with shaved cheese; if you’re deciding which, this guide on Pecorino Romano vs Parmesan is worth a read.
Italian street corn
A play on Mexican elote with an Italian accent: grilled corn slathered with a little mascarpone or pesto and showered in pecorino and black pepper. It’s sweet, smoky, salty, and slightly creamy — and it photographs well if you care about that sort of thing. This is my go-to for summer cookouts where the beef is coming out of a slow cooker.
Roasted vegetables and broccoli rabe
For a side that feels genuinely Italian-American rather than diner-adjacent, roast a tray of vegetables — zucchini, peppers, eggplant, broccoli — tossed with olive oil, garlic, and herbs at a high heat until the edges char. The caramelization gives you a sweet, smoky note that flatters the beef.
If you want to go fully Chicago-Italian about it, garlicky sautéed broccoli rabe is the move. Its pleasant bitterness slices straight through the fatty jus. It’s a more grown-up pairing, and I love it on a Sunday.
Pasta salad – yes; hot pasta – no! 🙂
A cold pasta salad with vegetables and an oil-and-vinegar dressing is a great make-ahead side, especially for parties. It’s hearty without being hot and heavy.
Now the warning, because trustworthy advice includes the failures: do not serve a rich, hot, creamy pasta alongside Italian beef. I tried it once — a baked pasta next to dipped beef sandwiches — thinking “more Italian comfort food, what could go wrong?” The answer is everything.
Two heavy, saucy, carb-forward dishes fighting for the same space left everyone overwhelmed and no one finishing their plate. Save your carbonara for a night when it can be the star. Beside an Italian beef, it’s just too much of a good thing.
Potato salad and baked beans (the cookout crew)
If your Italian beef is the slow-cooker, feed-a-crowd kind, these picnic staples earn their place. A tangy potato salad (try a lighter Greek-style version with lemon and herbs instead of the heavy mayo kind) and a pot of smoky-sweet baked beans round out a casual spread.
The sweetness of the beans against the salty beef is an underrated combination — use the bread to mop up the sauce.
Garlic bread – with one caveat
Garlic bread is delicious and nobody will complain. My only caveat is the obvious one: the sandwich is already bread. Two breads can feel redundant. If you go this route, serve smaller pieces and treat it as a vehicle for soaking up extra jus rather than a main event.
A homemade Italian tomato sauce on the side for dipping turns plain garlic bread into something people remember.
What I’d skip
A short honest list, because knowing what not to serve is half the battle:
Heavy cream-sauce pasta or mac and cheese — richness on richness, as covered above.
Anything with a competing strong sauce (barbecue, heavy curry) — it muddies the garlicky jus.
Another beefy or super-savory main — let the sandwich be the protein star.
Plain steamed vegetables with no acid or seasoning — technically “balanced,” but boring next to something this bold.
Drinks and dessert
To drink: A crisp lager or a hoppy pale ale is the beef-stand default, and it works. If you’re a wine person, skip anything delicate — you want a medium-bodied, acidic Italian red like a Chianti or a Barbera that can stand up to the garlic and fat.
For dessert: Here’s the one that sounds wrong and is completely right. In Chicago, the move is a chocolate cake shake — a milkshake with a slice of chocolate cake blended in — after your beef. I was skeptical the first time. I’m not anymore. The cold, sweet, ridiculous excess is the perfect full stop after a savory, messy meal. A scoop of spumoni or lemon sorbet does a gentler version of the same job.
Quick pairing cheat sheet
If you want…
Serve this
The authentic Chicago plate
Crinkle-cut fries + extra giardiniera + a chocolate shake
To cut the richness
Vinegary slaw, Italian chopped salad, or broccoli rabe
A summer cookout spread
Italian street corn, pasta salad, baked beans
Something light and pretty
Caprese or a green salad with lemon vinaigrette
Maximum indulgence
Cheese fries + a combo (add sausage)
To impress without much effort
A full antipasto board everyone shares
Frequently asked questions
What is the most traditional side for an Italian beef sandwich? French fries, full stop. In Chicago beef stands, fries are the default companion, and a side of giardiniera or sweet peppers is nearly as common.
What’s a healthy side for Italian beef sandwiches? A crisp green salad with a lemon or red wine vinaigrette, roasted vegetables, or garlicky broccoli rabe. All add freshness and acidity without piling on more richness.
Can I serve pasta with Italian beef? Yes, but choose a cold pasta salad over a hot, creamy pasta. Two rich, saucy dishes side by side overwhelm the palate.
What should I serve at an Italian beef party for a crowd? Set out fries or potato salad, a big antipasto or chopped salad, a bowl of extra giardiniera, and Italian sausages so guests can build a combo. Finish with something cold and sweet for dessert.
The bottom line
The Italian beef does the heavy lifting – your job with the sides is to give people contrast and a reason to keep eating. Lead with fries because tradition is tradition, but earn your stripes with something bright and acidic on the table too: a sharp slaw, a chopped Italian salad, a bowl of giardiniera that disappears before the sandwiches do.
Get that balance right and you’ll recreate that ninety-second silence at your own table. Just keep plenty of napkins handy.
Made a great spread? I’d love to hear what you served — drop your go-to side in the comments.
Jamie Oliver didn’t just burst onto the food television scene out of nowhere. Long before the cameras, the bestselling cookbooks, the high-profile school dinner campaigns, and his own restaurant empires, he was just another young cook grinding it out in a demanding London kitchen. If you trace that early chapter back to its roots, one name stands out as a massive turning point: Antonio Carluccio.
For anyone who loves Italian food in Britain, Carluccio wasn’t just a famous face. He was the ultimate bridge between Italy and the British dinner table, a writer, restaurateur, and teacher who showed people why Italian cooking is driven by pure emotion. If you look at the Antonio Carluccio biography page, you see a life defined by the Amalfi Coast, the forests of Piedmont, wild mushrooms, regional wine, and, crucially, the long-running story of the Neal Street Restaurant in Covent Garden.
That exact restaurant changed the trajectory of Jamie Oliver’s life. Carluccio took over Neal Street in 1981, turning it into a sanctuary for authentic Italian cooking in London, a place full of confidence, character, and genuine warmth. Years later, an 18-year-old Jamie walked through the doors to work as a pastry chef. It gave him far more than a line on his CV; it dropped him right into a food philosophy that would anchor his entire career.
Neal Street Gave Jamie Oliver His First Serious Italian Kitchen
The right kitchen can shape a chef long before fame arrives
The biggest impact on Jamie was giving him access to a high-caliber Italian kitchen at a formative age. Jamie was still figuring out his identity as a chef and searching for a style of cooking that felt intuitive. Neal Street gave him that compass.
The history connects Antonio Carluccio, Gennaro Contaldo, and Jamie Oliver in a single, passing-of-the-torch line of mentorship: Antonio mentored Gennaro, and Gennaro took Jamie under his wing.
Carluccio gave Jamie a job, but he also gave him a place where he could actually learn how to cook.
Neal Street was obsessed with seasonal ingredients, regional traditions, and a deep respect for food that didn’t need to be over-complicated. A young chef working there couldn’t help but absorb the idea that food could be generous, rustic, and vibrant without being fussy.
Antonio Opened The Door, Gennaro Carried The Lesson Forward
Knowledge travels furthest when it is passed from one generation of chefs to the next
While Carluccio built the foundation, the daily lessons often came via Gennaro Contaldo. Gennaro was a vital fixture at Neal Street and became arguably the most influential mentor of Jamie’s life.
The official Gennaro Contaldo website highlights him as the chef who truly taught Jamie the secrets of Italian cooking during their time together at Carluccio’s restaurant.
It’s a clear, beautiful chain reaction: Antonio created the space, Gennaro brought the raw Italian passion to the kitchen line, and Jamie soaked it all up. This direct line of influence, from Antonio to Gennaro to Jamie, eventually reached millions of home cooks through television screens and cookbooks.
You can trace almost all of Jamie’s signature style back to these roots. The rustic pastas, the heavy glugs of olive oil, the fresh herbs, and the relaxed, family-style sharing platters weren’t a marketing gimmick. They came straight from early years spent watching Italian chefs cook from memory, treating food as an extension of daily life.
Antonio Shaped The Way Jamie Talked To The Public
Antonio Carluccio never treated food with stuffy, academic detachment. He possessed immense knowledge, but he delivered it with infectious warmth. Whether he was talking about wild mushrooms, regional wines, or a simple plate of pasta, he made everyone feel invited to the table. He humanized Italian food for the British public, creating a blueprint that a younger generation of chefs could follow.
When Jamie became famous, it was precisely because he stripped away the elitism of professional cooking. He was energetic, loose, and convinced that great food belonged in ordinary home kitchens, not just high-end restaurants. Carluccio had already proven that you could be a teacher, author, and TV personality without selling out the soul of the food.
Carluccio showed that a chef could be a cultural ambassador. He didn’t reduce cooking to a performance; he gave it context, reminding people that a recipe carries tradition and memory. Jamie took that exact ethos and scaled it up for a massive media age.
The Stepping Stone to The River Cafe and Beyond
Neal Street’s role as Jamie’s launching pad is a well-documented piece of culinary history. As reports have noted when reflecting on his legacy, Antonio Carluccio helped launch Jamie Oliver simply by recognizing his potential and bringing him into the Neal Street fold.
Jamie eventually moved on to The River Cafe, which is where TV producers famously discovered him. But Neal Street happened first. It was the incubator where his confidence grew and his palate was formed.
For Carluccio, mentoring young talent was a quiet duty. Great restaurants don’t just feed customers; they serve as schools that change the broader food culture. Jamie might be the most famous alumnus of that school, but the lesson applies universally.
What Jamie Took From the Carluccio School of Cooking
Simple ingredients often leave the deepest mark on a chef’s philosophy
The DNA of Neal Street runs right through Jamie’s career:
Uncompromising respect for ingredients: Carluccio’s obsession with letting quality ingredients do the heavy lifting became a hallmark of Jamie’s most famous recipes.
Confidence in simplicity: Learning that a dish didn’t need complicated classic French techniques to be brilliant.
Food as an emotional connection: Seeing cooking as an expression of family, geography, and memory rather than just fuel.
Communicating with personality: Realizing that food education works best when delivered with humor, warmth, and zero pretension.
This doesn’t mean Jamie became a Carluccio clone. True mentorship doesn’t create carbon copies; it builds a foundation so a young cook can eventually find their own voice. Jamie became his own man, but the ground he stood on was laid at Neal Street.
A Legacy Passed From Chef to Chef
Food mentorship is deeply personal. Any chef worth their salt remembers the person who gave them their first real break, the kitchen that taught them discipline, and the mentors who showed them what soul looks like.
Carluccio gave Jamie a passport into an authentic, living food culture. It wasn’t a sanitized, commercialized version of Italy; it was the real thing, which meant foraging for wild mushrooms, rolling pasta by hand, and understanding wine as part of a meal instead of a luxury status symbol.
That is why this connection matters. Jamie Oliver became a household name, but Antonio Carluccio was there at the very beginning, helping to spark the fire.
The Big Picture
When people look back at Jamie Oliver’s career, the conversation usually centers on The Naked Chef, his school lunch crusades, or his massive media presence. But Antonio Carluccio deserves a prominent spot in that opening chapter.
Carluccio provided the kitchen, the culture, and the mentors that anchored Jamie’s culinary worldview. Through Neal Street and Gennaro Contaldo, a timeless philosophy of Italian cooking was passed down, refined, and eventually shared with kitchens all over the globe.
That is the real measure of Carluccio’s legacy. His impact didn’t stop when his own shows ended or his restaurants closed. It lived on through the hands of the young cooks he welcomed into his kitchen, cooks who took those lessons and changed the way the world eats.
If you have ever made beautiful homemade ravioli only to watch them dissolve into a cloudy, cheesy mess in the pot, the problem was almost never your pasta. It was your filling. After years of making filled pasta, and ruining plenty of batches along the way, I have become convinced that the filling is where ravioli are won or lost.
This guide is built around that belief. Below you will find nine ravioli filling recipes I actually make, organised from the foundational to the showy, plus the technical groundwork that most recipe sites skip entirely.
Antonio Carluccio had a famous motto: MOF MOF, “Minimum Of Fuss, Maximum Of Flavour”, and nowhere does that idea matter more than inside a raviolo, where you have one tablespoon of filling to make an entire dish sing.
Let’s start with the rule that will save your next batch.
The Golden Rule: Control the Moisture
Proper moisture control determines whether ravioli stay sealed or fall apart|Shutterstock
Here is the single most important thing about ravioli filling, and it is the thing nine out of ten articles bury at the bottom of the page: a wet filling will destroy your ravioli.
Excess moisture does three bad things. It makes the filling impossible to seal because the dough won’t grip a damp surface. It steams inside the parcel as it cooks and blows the ravioli open. And it leaches into the pasta, leaving you with a gummy, soggy shell instead of a tender one.
The usual culprit is ricotta. Most supermarket ricotta is packed with whey and sitting in liquid. If you scoop it straight from the tub into your filling, you are building on a swamp.
The fix is non-negotiable: drain your ricotta. Line a fine sieve with a couple of layers of cheesecloth (or a clean kitchen towel), spoon the ricotta in, set it over a bowl, and leave it in the fridge for at least a few hours; overnight is better. You will be genuinely surprised how much liquid drains out. If you are short on time, press it firmly with the back of a spoon and squeeze it in the cloth.
The same logic applies to every watery ingredient:
Spinach must be cooked, cooled, and then wrung out in a towel until it is almost dry and crumbly. A surprising amount of water hides in a handful of cooked spinach.
Mushrooms should be sautéed until they have given up their water and started to brown, never used raw.
Roasted squash or pumpkin is far better than boiled, because roasting drives off moisture and concentrates flavour.
Get the moisture right and everything else is detail.
The Anatomy of a Great Filling
Once you stop thinking of fillings as random combinations and start thinking of them as a formula, you can invent your own with confidence. Almost every great ravioli filling has four parts:
The base: the bulk of the filling. Usually ricotta, but it can be braised meat, roasted vegetables, or potato.
The binder: what holds it together so it doesn’t crumble or leak. Usually an egg yolk, sometimes grated hard cheese, occasionally a spoonful of fine breadcrumbs to soak up stray moisture.
The salt-and-savour: a finely grated aged cheese like Parmigiano-Reggiano or Pecorino Romano, which does the heavy lifting on flavour. (If you are unsure which to reach for, this breakdown of Pecorino Romano vs Parmesan explains exactly how they differ.)
The accent: the one bright note that lifts the whole thing: nutmeg, lemon zest, fresh herbs, a little black pepper, a whisper of garlic.
Keep that structure in mind as you read the recipes below and you will see it appear again and again.
9 Ravioli Filling Recipes
Quantities below are generous enough for roughly 30 to 40 medium ravioli (serving four). All cheese measurements assume the ricotta has been drained.
1. Classic Ricotta & Parmesan (the foundation)
The one to learn first. Master this and you understand ravioli.
250g ricotta, well drained
60g Parmigiano-Reggiano, finely grated
1 egg yolk
A pinch of freshly grated nutmeg
Salt and freshly ground black pepper
Mix gently; do not whip it. Taste it raw (it is safe with a pasteurised egg yolk, or fry a tiny test spoonful) and adjust the salt. It should taste a touch too seasoned in the bowl, because the bland pasta will mute it. This pairs beautifully with nothing more than butter and sage, or with a simple homemade Italian tomato sauce.
2. Spinach & Ricotta
Traditional combinations endure because they balance flavor and texture|Shutterstock
The trattoria classic, and the one most people make wrong by skipping the wringing step.
250g ricotta, drained
150g cooked spinach, squeezed bone dry and finely chopped
50g Parmigiano-Reggiano
1 egg yolk
Nutmeg, salt, pepper
The nutmeg is not optional here; it is the traditional partner to spinach and ricotta and the dish tastes flat without it.
300g mixed mushrooms, finely chopped and sautéed in butter until dry and golden
150g ricotta, drained
40g Parmesan
1 small shallot, softened in the same pan
Leaves from a few sprigs of fresh thyme
A splash of dry white wine, cooked off completely
Let the mushrooms cool fully before mixing in the ricotta, or the heat will make the cheese weep. A few notes on which herbs play well together can be found in this guide to the best Italian herbs for cooking at home.
4. Butternut Squash & Sage (or Pumpkin)
Roasting concentrates flavor while improving filling consistency|Shutterstock
A northern Italian favourite, especially around Mantua. Slightly sweet, gorgeous with brown butter.
300g squash or pumpkin, roasted until soft and mashed
80g Parmesan
1 egg yolk
A small handful of crushed amaretti biscuits (the traditional touch; adds sweetness and absorbs moisture)
Nutmeg, salt
Roast, never boil, the squash. Boiling is the fast track to a watery filling and a heartbreaking pot of burst ravioli.
5. Three-Cheese
Richer and more indulgent than the classic ricotta filling.
200g ricotta, drained
75g mozzarella, grated and patted dry
60g Parmesan or Pecorino
1 egg yolk
Fresh parsley, salt, pepper
Dry the mozzarella well; fresh mozzarella is another sneaky source of water.
6. Braised Meat (the Sunday filling)
Many classic ravioli fillings began as practical ways to use leftovers|Shutterstock
This is how filled pasta was traditionally made in many Italian homes: as a clever way to use leftover slow-cooked meat. If you have made a ragù, you already have the start of a filling; see the Tagliatelle al Ragù Bolognese recipe for the braise.
250g cooked braised beef or pork (or leftover roast), very finely chopped or pulsed
50g Parmesan
1 egg
1 to 2 tablespoons fine breadcrumbs to bind
A spoonful of the braising juices, plus nutmeg and salt
The breadcrumbs here do double duty: they bind the meat and soak up any stray fat or liquid.
7. Sausage & Fennel
@casterazucar This pork and fennel ravioli is super easy, not at all traditional and might garner a little bit of backlash, but WHATEVER G: For the Pasta: 1 Medium Cooked Beetroot 2 Eggs 2 Pinches of Salt Tbps Olive oil 2 sprigs of fresh rosemary, leaves removed Blend the above ingredients until suuuper smooth. ~300g High Grade Flour + extra for dusting (this will be variable due to egg size and beetroot size, but start with the amount listed above) Put the flour on a large clean work surface, make a crater in the flour and pour in the beet-egg mixture. Slowly incorporate the flour with a fork until well combined. this might not be enough flour, so add more slowly until it kneads on the bench without sticking. Knead until smooth and not tacky anymore. Rest for half an hour, under a bowl (i dont use cling film for this). Fennel and Pork Filling 500g Pork Mince A tbsp fennel seeds 1 Bulb of fennel, minced 2 Cloves of garlic, minced Salt Pepper Olive Oil Water Add the garlic fennel seeds and bulb to a well-oiled pan. Caramelized on a medium high heat. Add water when it starts to stick. Reduce, add water, repeat until the fennel is soft and a few shades darker. Mix with the pork meat. Season well with salt and pepper (I fry up a little bit to check the seasoning is correct). Create your ravioli using your preferred method of ravioli making – stuff the pork and fennel mixture in. Cook in simmering salted water for a while – too short and the meat will be undercooked. But you don’t want a rolling boil – it’ll overcook in a heart beat. Goes well with olive oil, and some sort of citrus juice, as well as fennel stalks, or you can do what I did – a cauliflower and celery puree: -Half a cauliflower, roughly chopped -2 Large Celery Stalks, roughly chopped -400ml whole milk -50g salted butter -Salt and white pepper Add all the above to a pressure cooker. Pressure cook on a low-med heat for 20mins. Slowly release pressure. Puree with an immersion blender. Salt and white pepper to taste. Enjoy! #fyp#ravioli#cooktok deas #italianfood#cooktok♬ original sound – Caster Azucar
Big, bold, weeknight-friendly flavour with almost no effort.
250g good Italian sausage, casings removed, browned and cooled
100g ricotta, drained
40g Parmesan
A pinch of fennel seed (if your sausage isn’t already seasoned with it)
1 egg yolk
Drain the cooked sausage well on paper towel before mixing.
8. Lemon & Ricotta
Citrus can transform rich fillings into something lighter and fresher|Shutterstock
Light, fresh, and perfect for spring. This is the filling I make when I want ravioli to taste like sunshine.
250g ricotta, drained
60g Parmesan
Zest of 1 lemon
1 egg yolk
A little chopped basil, salt, white pepper
Serve simply, with butter and a squeeze of lemon; let the filling do the talking.
9. Egg Yolk Raviolo (uovo in raviolo)
The showstopper. A single large raviolo with a soft, runny egg yolk suspended in a ring of seasoned ricotta. It cuts open to a golden flood of yolk. Not for a first attempt, but unforgettable when you nail it.
Classic ricotta filling (recipe 1), piped into a thick ring
1 very fresh egg yolk per raviolo, nestled in the centre
Cook for only 2 to 3 minutes so the yolk stays liquid
Bonus – sweet ricotta: drained ricotta, a little sugar, lemon zest, and grated dark chocolate makes a dessert raviolo that surprises everyone at the table.
What the Internet Gets Right (and Wrong)
I spent some time reading through the home-cook communities on Reddit, including r/Cooking, r/pasta, and r/fitmeals when people are chasing protein, to see what experienced amateurs have learned the hard way. The consensus is remarkably consistent, and it lines up with everything above:
“Drain the ricotta or suffer.” This is the single most repeated piece of advice in every thread, usually from someone who learned it by watching their first batch fall apart. If you take nothing else from this article, take this.
The wonton wrapper shortcut. A genuinely popular hack: use shop-bought wonton or gyoza wrappers instead of making pasta dough. Purists wince, but the community is overwhelmingly positive. It is fast, the results are good, and it is a brilliant way to practise your fillings before committing to homemade dough. One common tip: if a single wrapper feels too thin, press two together with a little egg wash.
Press out the air. Trapped air expands in boiling water and pops the seal. Seal from the filling outward, pushing air to the edges before you crimp.
Don’t overfill. The most common beginner mistake after wet ricotta. A teaspoon to a tablespoon is plenty; an overstuffed raviolo cannot seal and will burst.
Stop dumping ravioli in a colander. A point professional kitchens make constantly: lift cooked ravioli out with a slotted spoon or spider, straight into your sauce. Tipping a whole pot through a colander batters the delicate parcels and splits them.
Freeze them raw. Lay filled ravioli on a floured tray, freeze until solid, then bag them. They cook straight from frozen and it makes a weeknight dinner effortless.
The thing the internet gets wrong? Treating filling as an afterthought to the dough. Almost every viral “easy ravioli” post lavishes attention on the pasta and gives the filling two lines. It is exactly backwards.
My Honest Opinion
A few things I have come to believe, which you are free to disagree with:
The classic ricotta-Parmesan filling is still the best
After all the mushroom-truffle-lobster experiments, the one I come back to is the simplest. It is the purest expression of Carluccio’s MOF MOF idea: three or four good ingredients, treated with respect, beating any over-engineered filling.
Egg yolk in the filling matters more than people think
Even a single yolk transforms the texture from grainy and loose to silky and cohesive. I now add one to almost everything.
Skip the garlic-heavy fillings
Raw or aggressive garlic inside ravioli tends to turn harsh and dominate the delicate pasta. If you want garlic, put it in the sauce, not the parcel.
Wonton wrappers are not cheating
I resisted for years out of snobbery. They are a perfectly legitimate way to eat homemade-tasting ravioli on a Tuesday, and they let you focus on the part that actually matters: the filling.
Pro Tips for Filling and Sealing
Chill the filling before you use it. Cold filling is firmer, easier to portion, and less likely to leak. Make it an hour ahead.
Use a piping bag (or a zip-top bag with the corner snipped) for neat, consistent dollops, especially for ring-shaped fillings.
Season harder than feels right. The pasta is bland; the filling has to carry the seasoning for both.
Brush a little water or egg wash between the sheets only where they meet, then press out the air and crimp firmly with a fork or cutter.
Cook gently. A rolling boil tears ravioli apart. Bring the water to a boil, then drop it to a gentle simmer before they go in. They are done about a minute after they float. If you want the science of getting pasta texture exactly right, here is how to cook pasta al dente every time.
Frequently Asked Questions
What is the best filling for ravioli?
For beginners, a drained ricotta and Parmesan filling with an egg yolk and a little nutmeg is the most reliable and the most versatile. It seals well, holds together, and pairs with almost any sauce.
Why is my ravioli filling watery?
Almost always undrained ricotta, un-wrung spinach, or boiled (rather than roasted) vegetables. Drain, squeeze, and roast. You can also add a spoonful of fine breadcrumbs or extra grated Parmesan to absorb any remaining moisture.
Do you need egg in ravioli filling?
Not strictly, but an egg yolk dramatically improves texture and helps the filling bind. Most professional fillings include one. Hard grated cheese also acts as a binder if you prefer to leave the egg out.
Can I make ravioli filling ahead of time?
Yes. Most fillings keep in the fridge for two to three days and actually benefit from a rest, which lets the flavours settle and the mixture firm up. Filled raw ravioli also freeze beautifully.
What sauce goes with ravioli?
Match the sauce to the filling. Delicate cheese and lemon fillings love butter and sage or a light tomato sauce; richer meat fillings stand up to a fuller ragù. The principle is the same one behind choosing the right sauce for gnocchi: keep it light enough to let the filling lead.
Should I use fresh or dried pasta for ravioli?
Ravioli are always made with fresh egg pasta because dried pasta cannot be sealed around a filling. If you want to understand the difference, this comparison of fresh pasta vs dry pasta explains when each one belongs on your plate, and choosing the right flour for fresh pasta makes a real difference to the dough.
Final Thoughts
Great ravioli are not about exotic ingredients or professional equipment. They are about respecting one tablespoon of filling enough to drain it, season it, bind it, and balance it. Get the moisture right, build on the four-part formula, and you can invent fillings for the rest of your life.
Start with the classic ricotta and Parmesan this week. Once it works, the other eight will feel easy, and you will never look at a tub of ricotta the same way again.
Cannoli bites with mascarpone and pistachio filling are a practical no-cook dessert built around the best parts of Italian pastry: crisp shells, cold cream,...
We use cookies to ensure that we give you the best experience on our website. If you continue to use this site we will assume that you are happy with it.


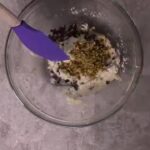


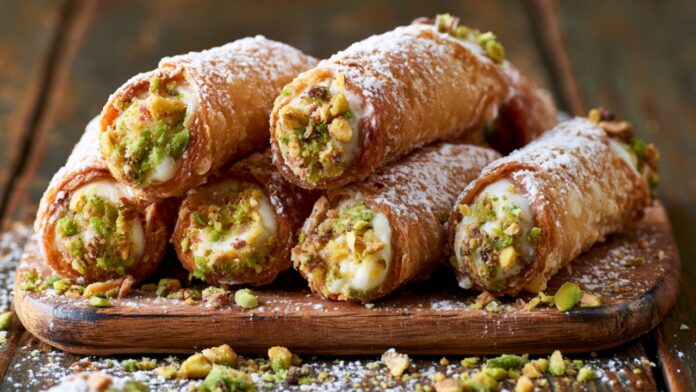
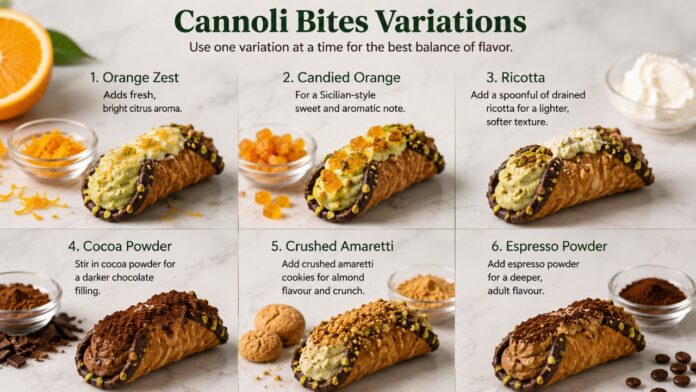


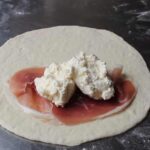


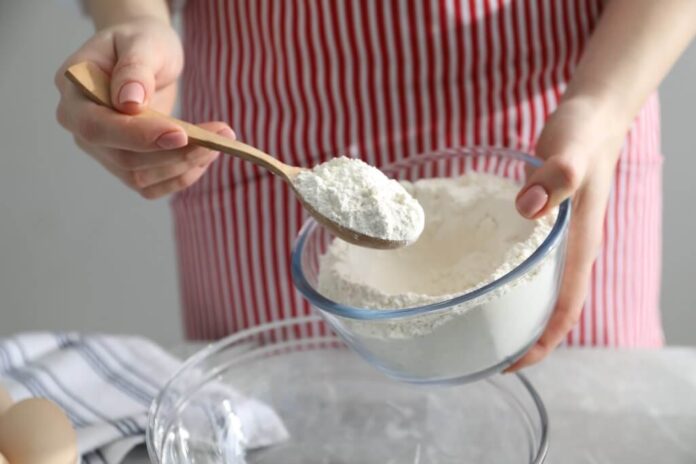

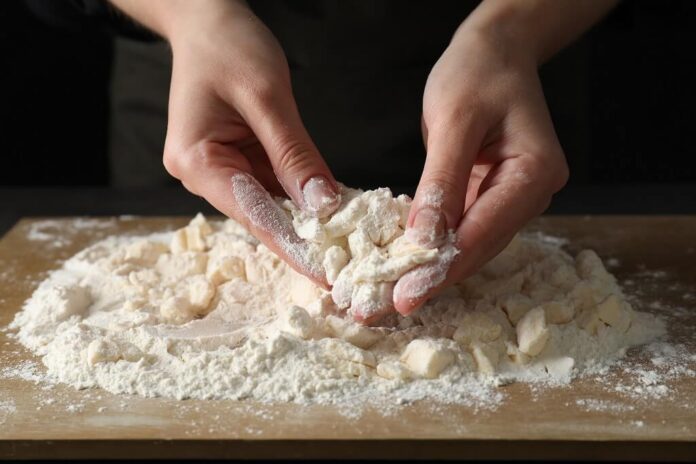


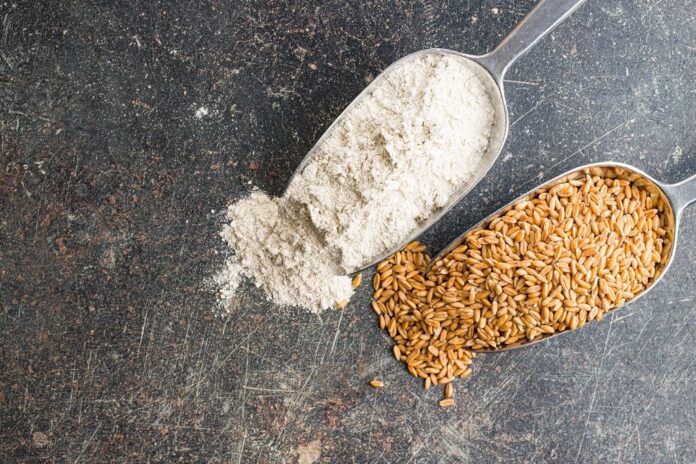
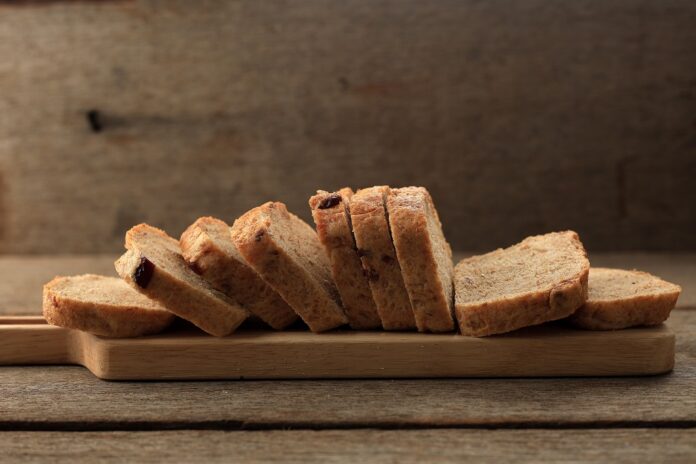
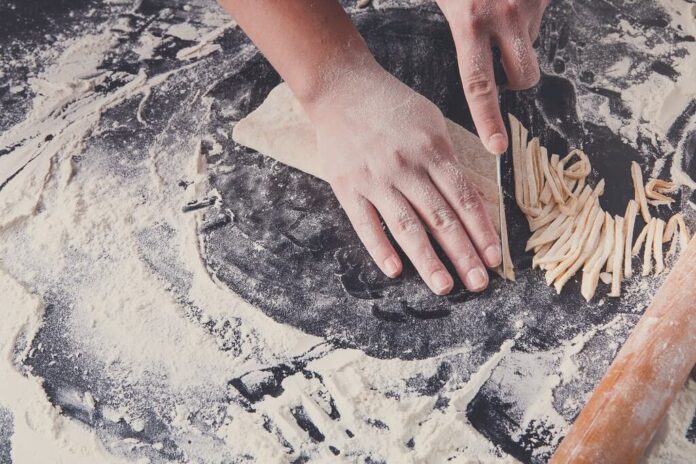
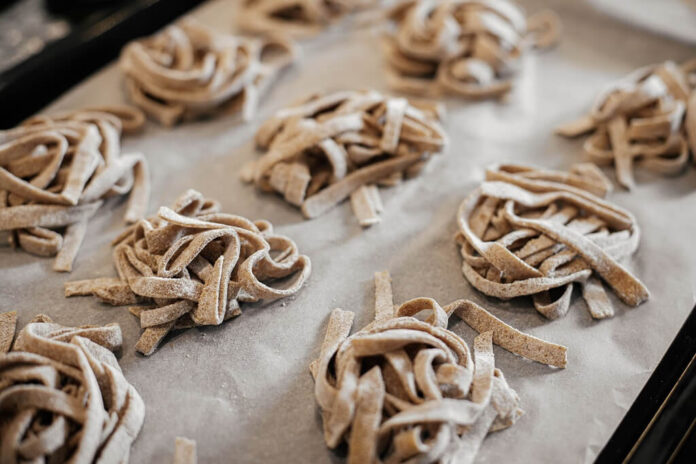

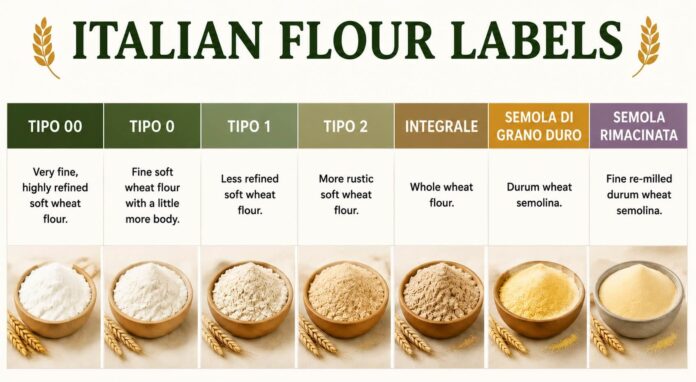
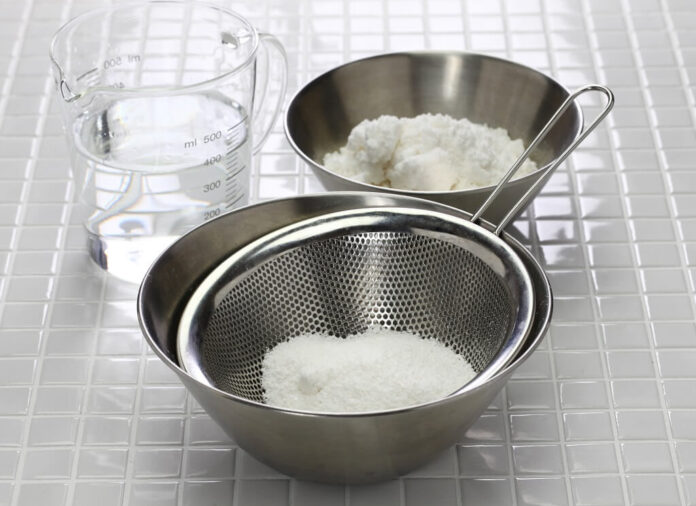
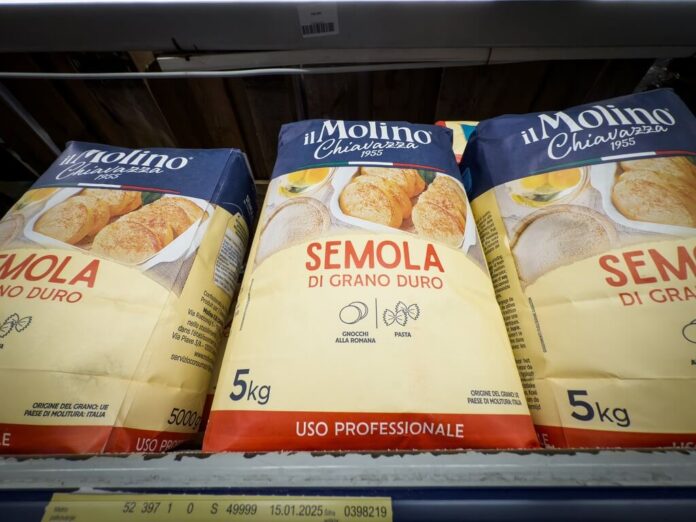
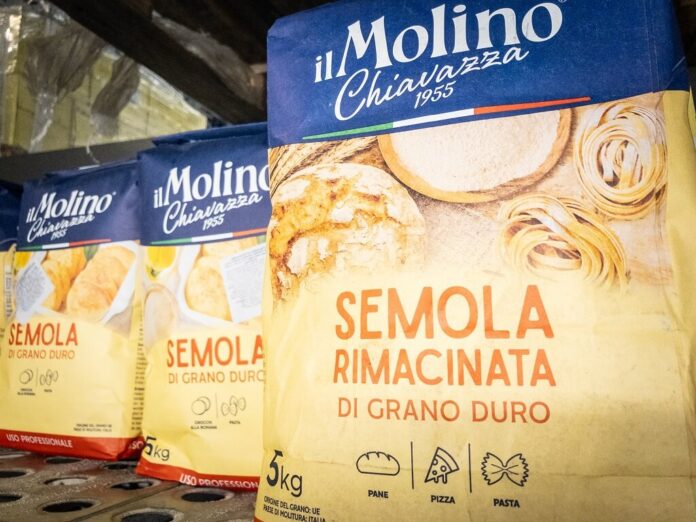
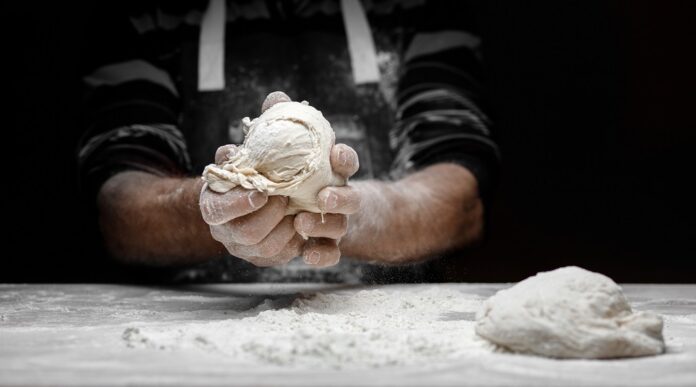
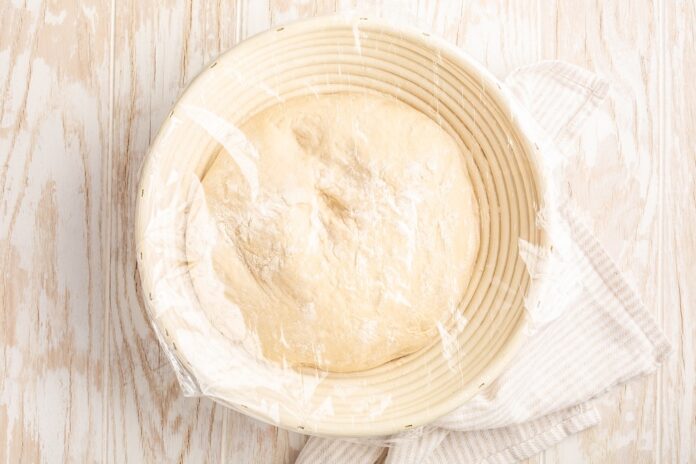


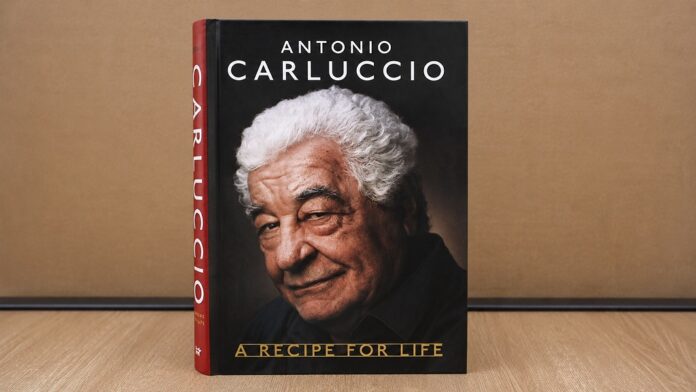

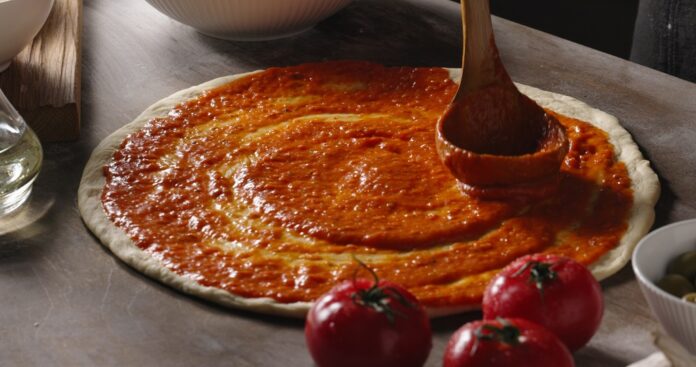
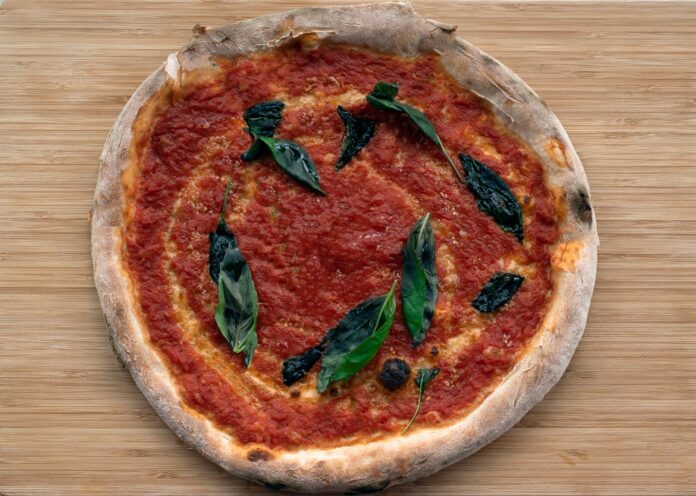
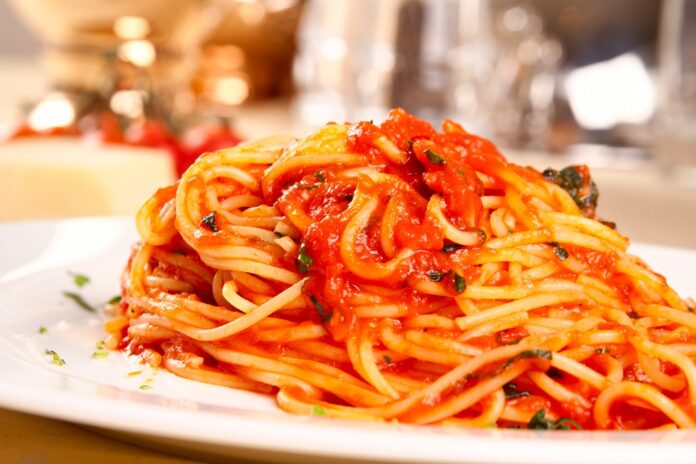

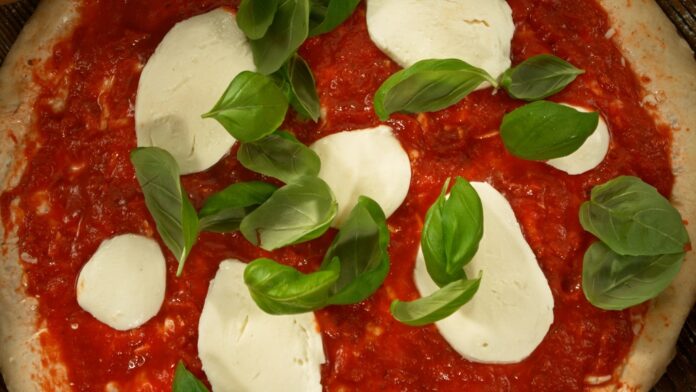


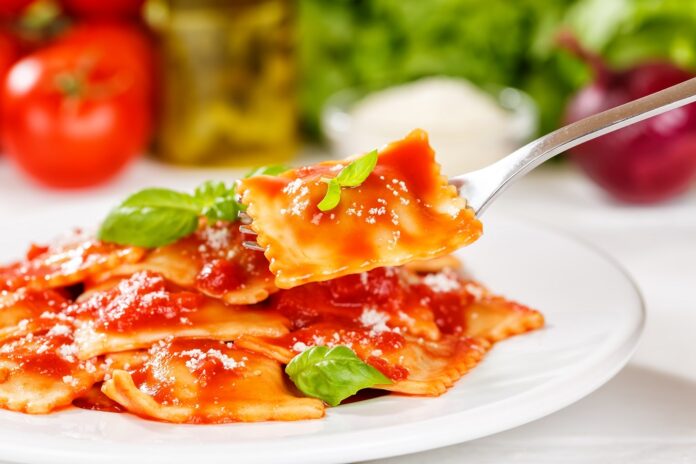


